19

19Hyphenation and Hyphenator

19.1

Getting Hyphenator

The Hyphenator package is a single hyphenator.js file that we run on each web page and that is it. It looks after itself.

We can tell Hyphenator what to do: if we give an element the class hyp, Hyphenator will hyphenate it. If we give an element the class nohyp (or just don’t give it the class hyp), Hyphenator will do nothing, it won’t hyphenate the text.

If you have downloaded the website template, you will already have a copy of the hyphenator.js file installed in the correct folder (you don’t need to do what follows).

Hyphenator has a configuration web page that allows us to pick certain options before downloading the file. We need to do this so go to the following website:

http://mnater.github.io/Hyphenator/mergeAndPack.html

It takes you to the Hyphenator merge and pack web page. This page allows us to set various options.

19.1.1

Creating a file to hold the Hyphenator code

The Merge and Pack web page above creates the actual JavaScript we need for Hyphenator, but it doesn’t save it as a file, it is a cut and paste exercise, you will see what I mean in a moment. It means we need an empty file to put it in.

We are going to create an empty file called hyphenator.js in the directory:

21-global/05-js

This is the same place we put the Waypoints file (see Figure 18.6).

In Brackets, navigate to the 21-global/05-js directory and create a new file. Rename the file hyphenator.js and leave it open in Brackets.

19.1.2

The Hyphenator options

Go to the Hyphenator Merge and Pack page:

http://mnater.github.io/Hyphenator/mergeAndPack.html

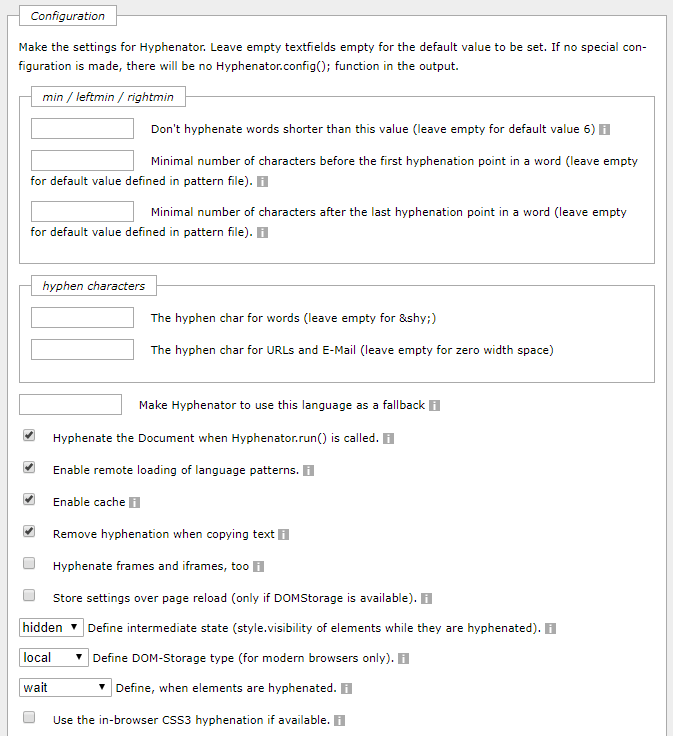
And set the following options:

Figure 19.3 - Hyphenator loader selection
Figure 19.3   Hyphenator loader selection

Leave the first box unticked, we don’t want the loader

The next bit selects the language we want, I want British English (because I am British and English). If you are American, you will want American English. Both of these will work if the lang attribute is set to en, e.g.:

<html lang="en">  

If you want some other language, you will have to change this attribute; for example, if you have the misfortune to be French, use lang="fr", alternatively just surrender and use English.

The language is selected on the next bit, this is what I selected:

Figure 19.4 - Hyphenator language selection
Figure 19.4   Hyphenator language selection

The next set of selections remain at their default values:

Figure 19.5 - Hyphenator configuration selection
Figure 19.5   Hyphenator configuration selection

This is followed by the bit that we do have to change, the class names, the names I want are hyp and nohyp, enter them as shown here:

Figure 19.6 - Hyphenator set the class names
Figure 19.6   Hyphenator set the class names

There are no changes to the rest of it:
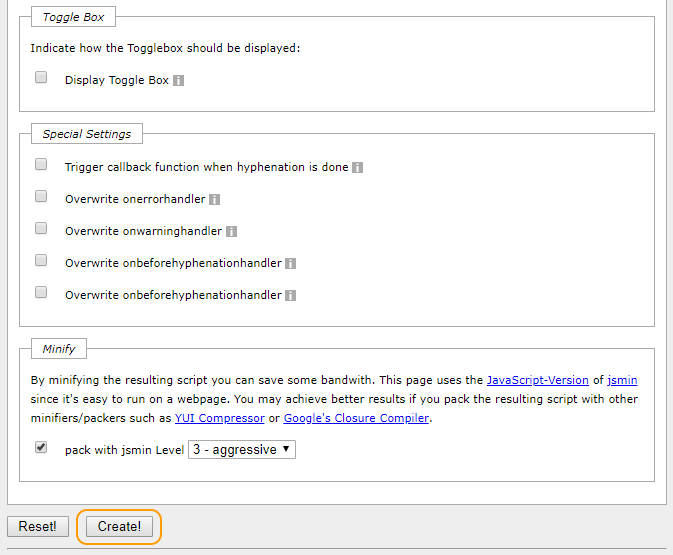
Figure 19.7 - Hyphenator final selections
Figure 19.7   Hyphenator final selections

The next thing is to click the create button (highlighted above) to generate the code, it gives us this:

Figure 19.8 - Hyphenator generated code
Figure 19.8   Hyphenator generated code

We want everything in the box, it is already selected, either right click and select copy or press ctrl+c to copy it.

Now go to the empty hyphenator.js file in Brackets and paste it in.

Save the file and that is it.


End flourish image