OK, you’ve built a beautiful website full of information that everyone needs and you’ve published it for the whole world to see.
So now what happens?
Well not much. Just publishing your website doesn’t do anything, well it publishes it on the internet so people can see it, but it won’t show up in any Google searches. Not right away at least.
Google needs to find your site, it needs to look through it (crawl you website) and index what is in there for its search algorithms — Google is a bit nosey.
If you do nothing, Google will eventually get round to finding your site (particularly if some other site is linking to it), but this can take a while (weeks).
To speed things up a bit, you can tell Google that your site exists (register your site with Google) and it will start crawling it straight away.
24.4.1
The sitemap
However, before you do that you are going to need something called a sitemap. This is an XML file, usually called sitemap.xml and it lives in the public_html folder (along with index.html).
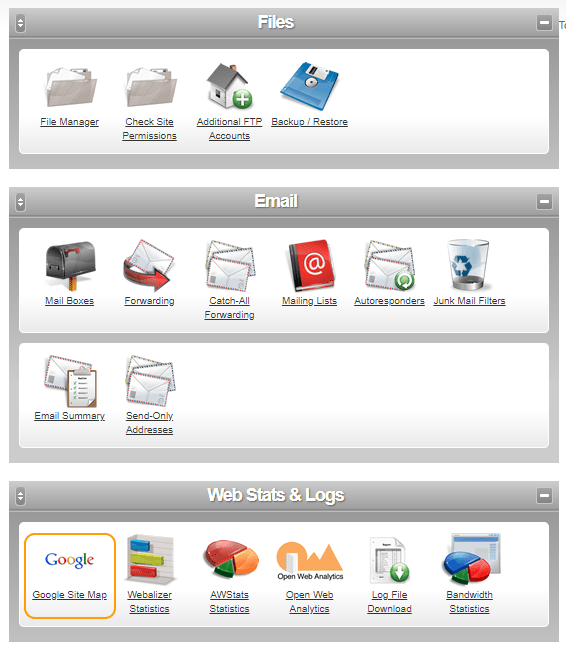
Most web hosts provide a mechanism for generating a sitemap.xml file. This is what Heart Internet do (it is on the web host console page):
Figure 24.32 Heart Internet site map generator
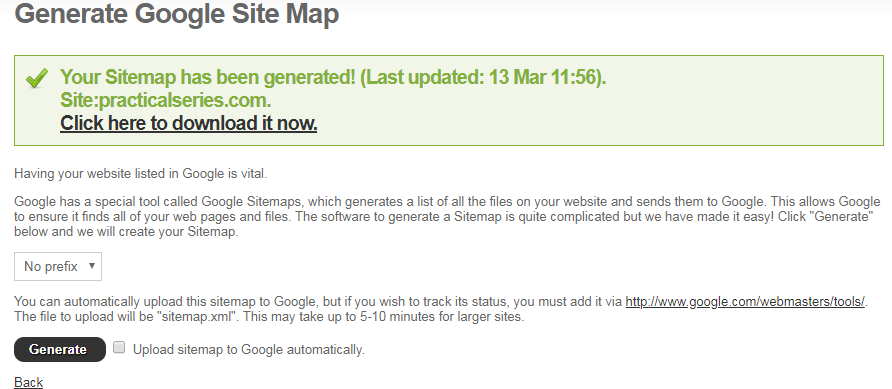
It will generate the sitemap for me and allow me to download it:
Figure 24.33 Heart Internet site map generator page
If I click the generate button it will automatically create the sitemap.xml file. It will then give me the option to download it.
This is what mine looks like (it is possible to open it in a browser). This is just the start of it, there is quite a lot altogether, mine has 9700 lines in it in total:
Figure 24.34 Practical Series website sitemap.xml file (extract)
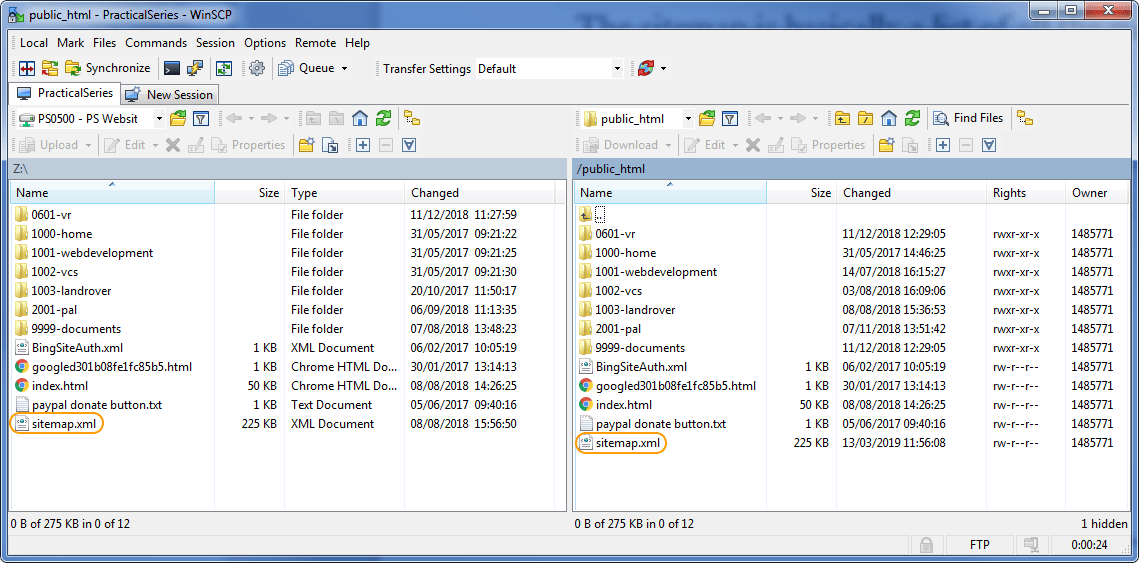
Once you have downloaded your sitemap.xml file, it needs to be copied to the published website, in the public_html directory. This is where mine lives:
Figure 24.35 Practical Series sitemap.xml file on the website
You can see it’s in both the offline and online directories.
24.4.2
Registering a site with Google
The sitemap is one of two things that Google needs to register your site; the second is a validation file that proves to Google that the site is yours.
To do this access the Google Search Console. Note you will need a Google account to do this.
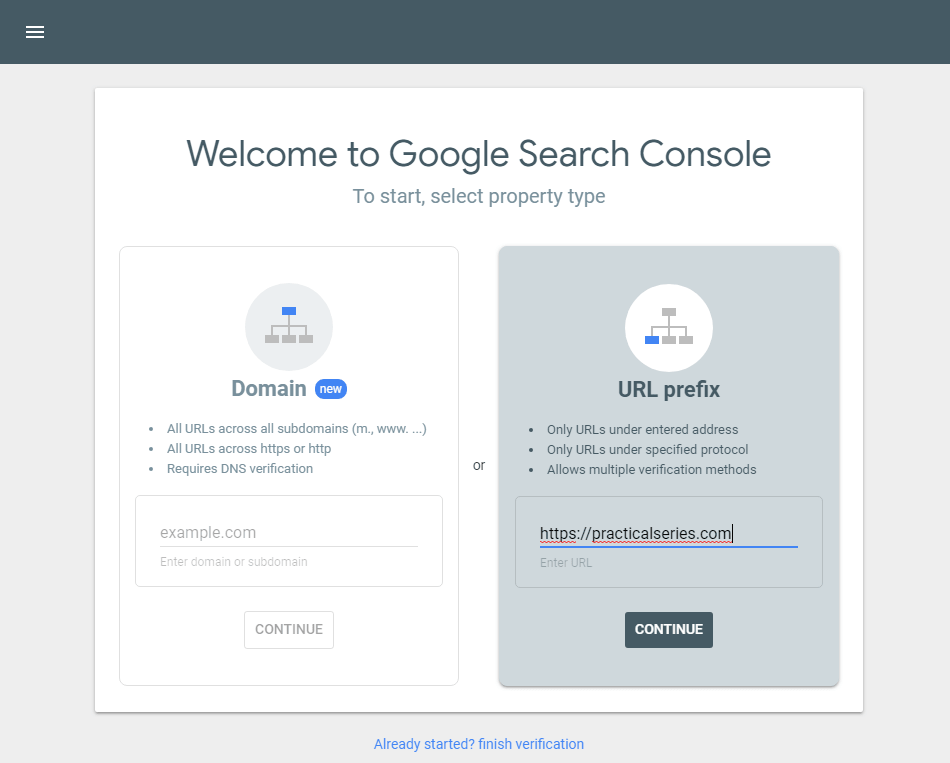
Google Search Console will ask you to sign in, and will then take you to the welcome page:
Figure 24.36 Google Search Console — starting
I used the URL prefix mechanism (it was easier), enter your web address complete URL, this will start either https:// or http:// and may or may not have www in it. Make sure you get it right; it’s a bugger to change afterwards.
Click continue and you will get a screen like this:
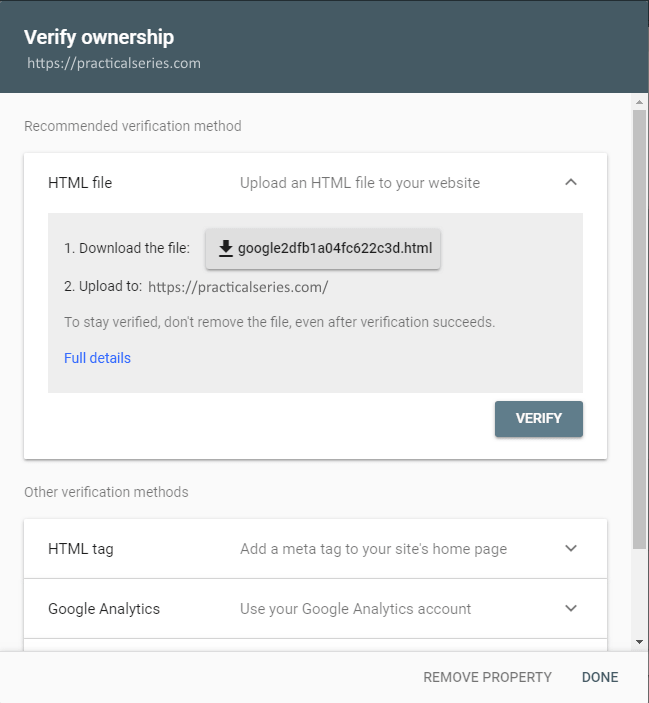
Figure 24.37 Google Search Console — verification
What Google want you to do is download the file (point 1) and copy it to the public_html directory of your website. The idea being if you are able to modify the website, then it presumably belongs to you and you have the authority to change it and Google will be satisfied that it is yours.
Download the file and upload it to the public_html folder, this is mine:
Figure 24.38 Google Search Console — verification file in public_html directory
Once the file is in the online public_html directory, click the verify button on the Google web page.
Google will respond with a verification successful message, this will also tell you not to remove the verification file from the website.
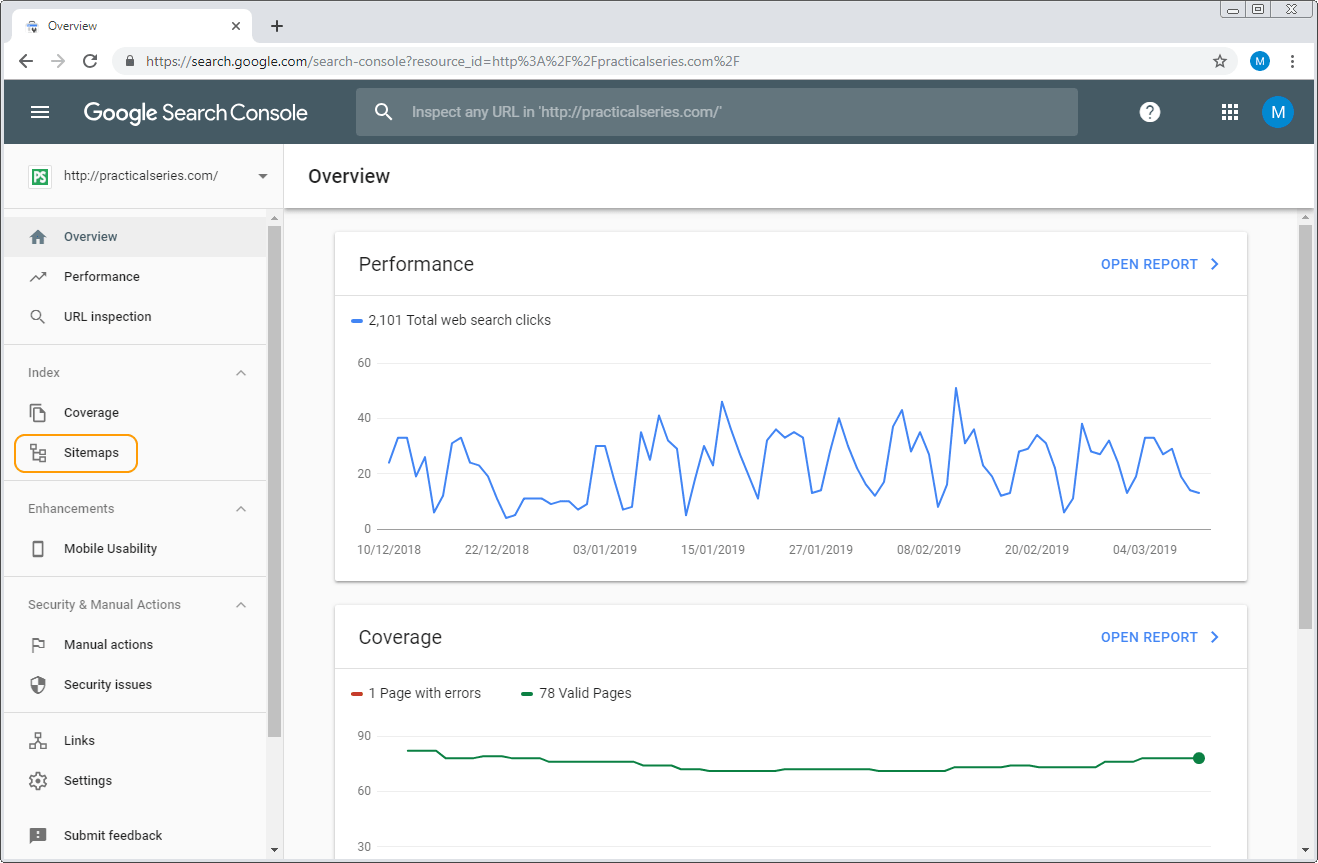
You will now have access to your Google Search Console. Mine looks like this:
Figure 24.39 Google Search Console — overview page
If your site is new, you won’t have any performance or coverage data.
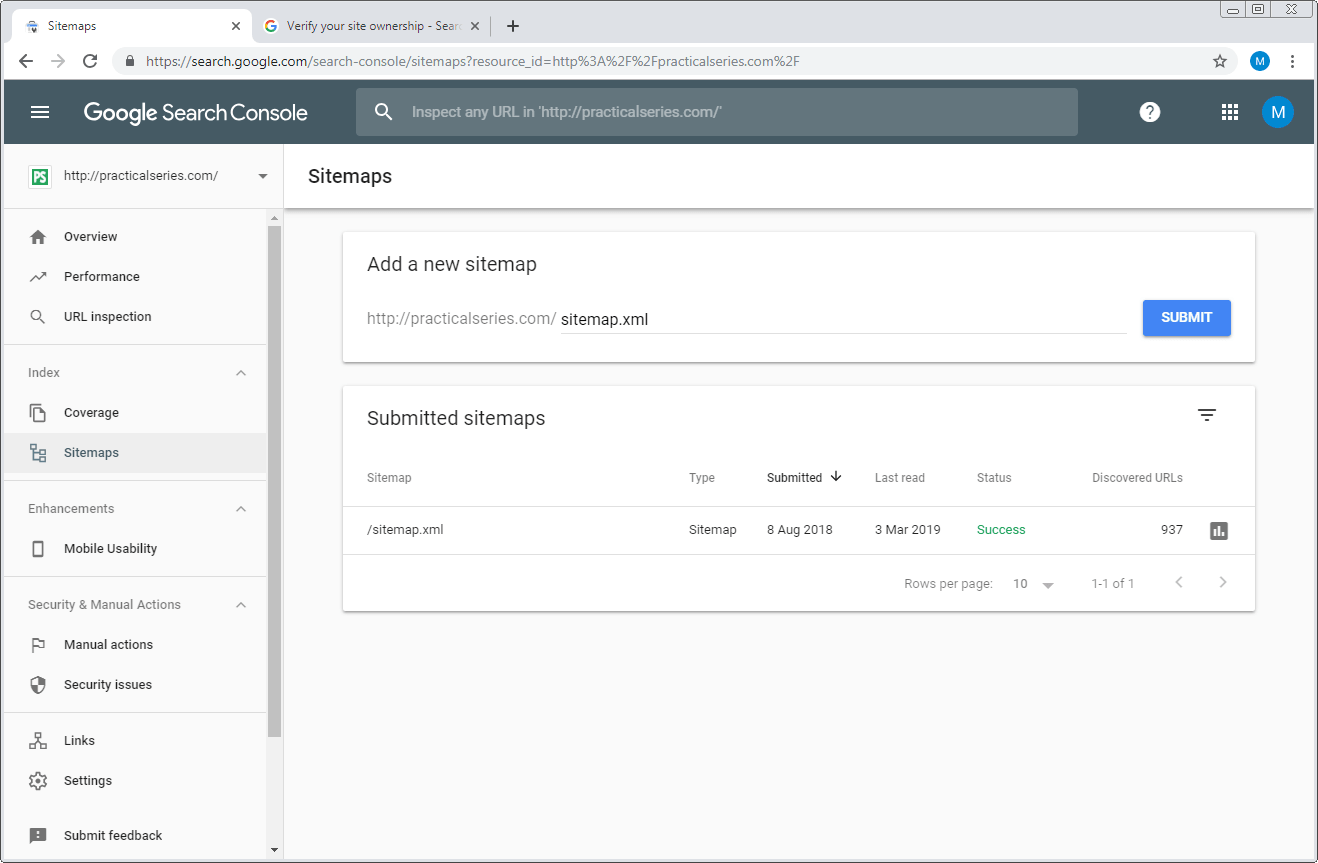
The next thing to do is tell Google where your sitemap is, click the sitemap link on the left hand side (if the left hand menu is not visible, click the hamburger button at the top):
Figure 24.40 Google Search Console — sitemap page
Enter sitemap.xml in the add new sitemap area and click submit.
If Google can find the file, you will get a success popup:
Figure 24.41 Google Search Console — sitemap page
The submitted area will show the status of sitemap and the date it was submitted.
That’s it; Google is now crawling your site and indexing what it finds.
24.4.3
Google Analytics
Google Analytics is separate to the Google Search Console
Google Search Console gives you broad data about how many pages have been crawled and indexed, it also provides information about how many times a user clicked through to your site and how many times your site showed up in search results (impressions),
Google Analytics on the other hand shows a great deal of information about who views your website, what country they are in, what they searched for, &c. A whole load of stuff.
Google Analytics is a whole book by itself; if I’m honest I don’t exactly understand the details of what you can do with it — I tend to just use if for the obvious stuff, how many visits, where from &c.
I’m not going to cover Google Analytics in any great detail, but I will show you how to set it up for your website.
Again you will need a Google account to do this.
The Google Analytics website can be found here, it looks like this:
Figure 24.42 Google Analytics page
Click the start for free button (top right, highlighted) and this will then ask you to sign into your Google account.
Do this and you will end up on the new account page:
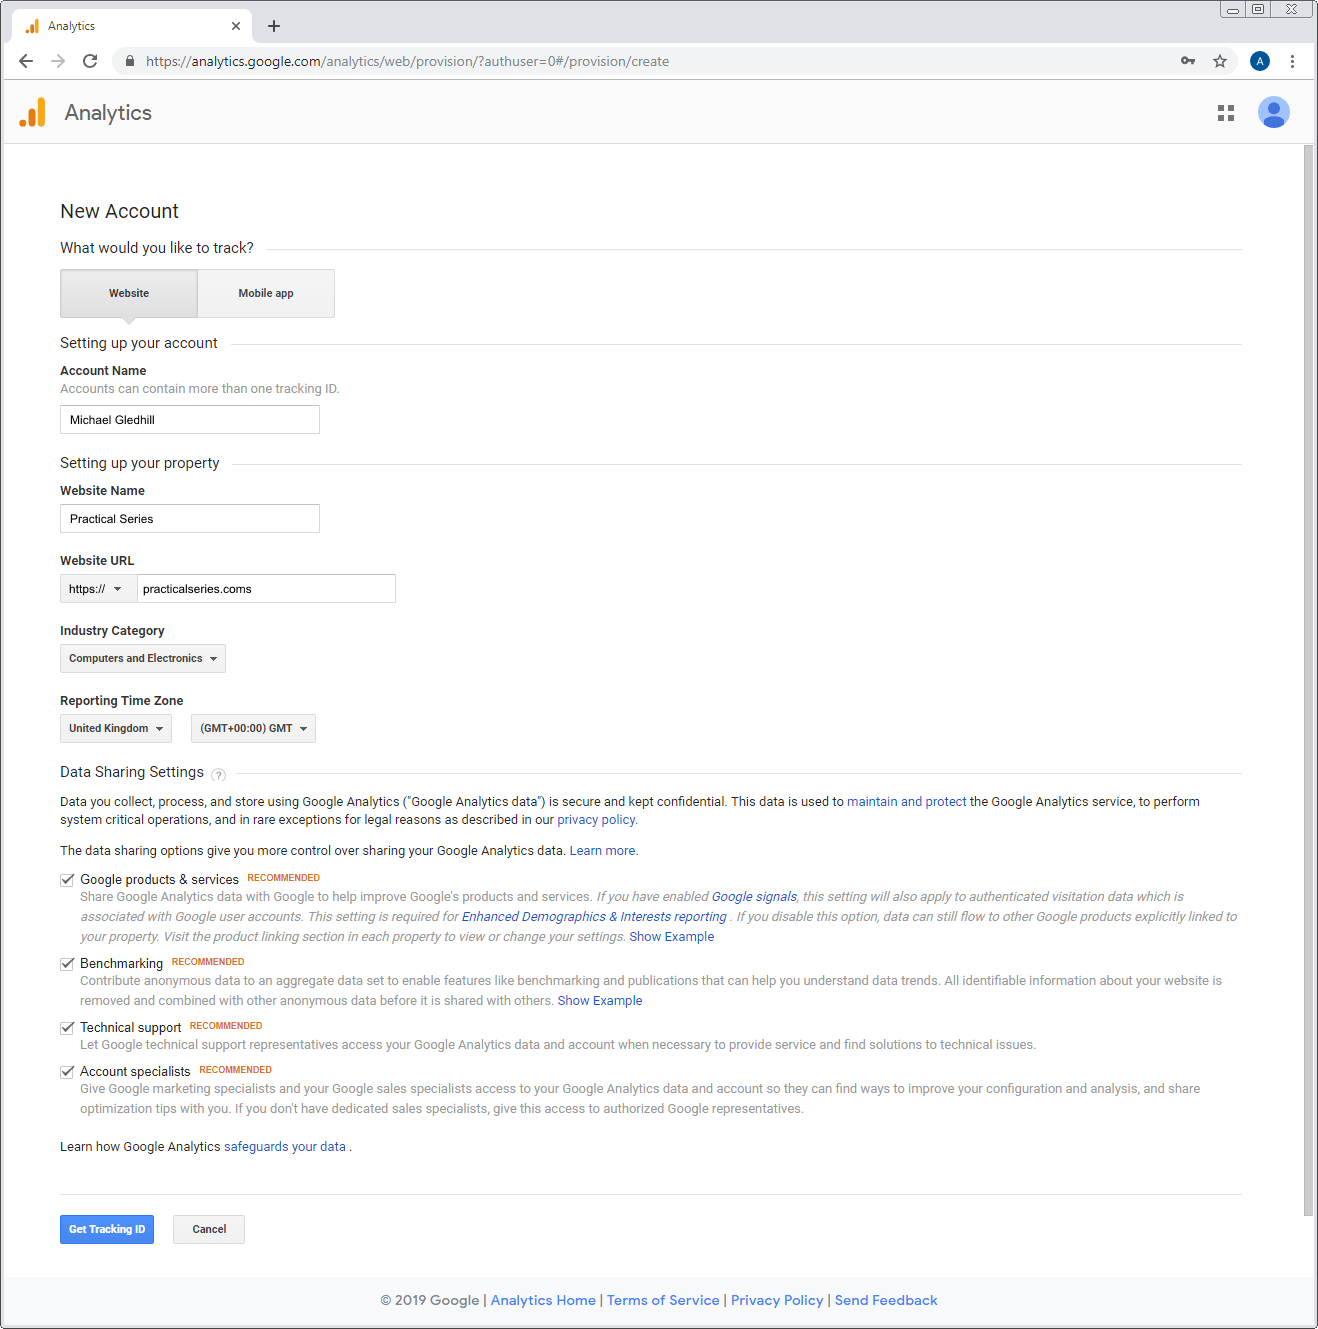
Figure 24.43 Google Analytics — new account
You need to give it an account name, your account can have multiple websites within it.
Next specify a website name (this is just the visible name it will use to identify the website). Unimaginatively I used Practical Series.
The next bit is asking for the URL of the website, make sure the correct https:// or http:// is selected in the dropdown, then enter the URL in the box (it may or may not have www in it).
Finally pick the most suitable industry category, set your time zone and tick all the boxes.
With everything filled in, click the get tracking id button at the bottom. This will open an accept the terms box:
Figure 24.44 Google Analytics page
Tick the boxes and click I accept.
This gets you to the tracking ID page:
Figure 24.45 Google Analytics — Tracking ID
Google Analytics requires a JavaScript entry to be placed on each page of your website. It must be in the <head> section. It is this script that generates a cookie on the browser of anyone who views your web page, this is used to collect certain data about the user, Google give details of what they collect on their data collected by google analytics page.
What is needed is for the code fragment in the window, between the first <script> and the last </scrip> tags to be copied and pasted into each page of your website.
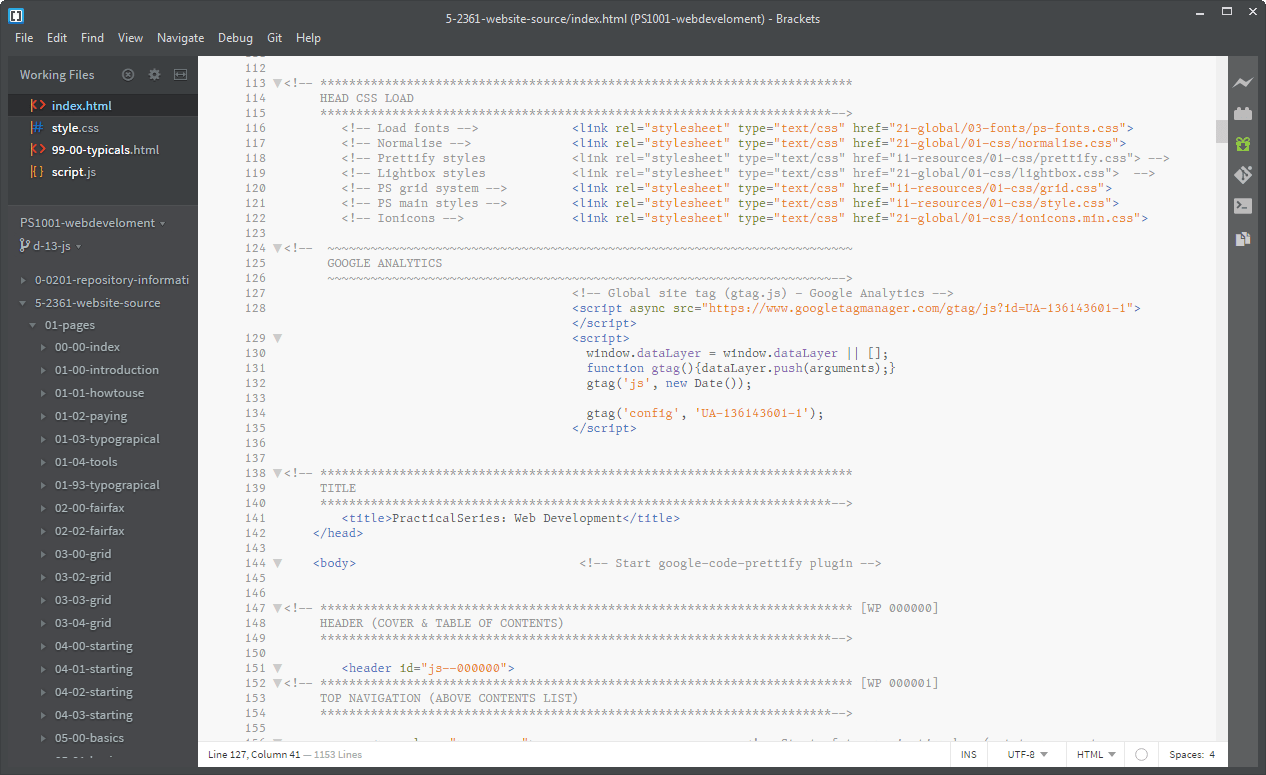
Select everything in the window and paste it into the <head> section of each html page on your website, here is an example of mine:
Figure 24.46 Google Analytics — Script on a web page
You can see exactly the same code pasted in starting at line 127. That’s it, just copy and paste it onto each HTML web page.
24.4.4
Anonymising IP data
By and large, the data that Google Analytics collects is in an anonymous form (see, Privacy and personal data), the exception is the IP address of the user, this is considered to be personally identifiable information.
By default Google Analytics collects the IP address of the website user. It is possible to stop Google Analytics doing this by making it anonymise the IP address data; this is done by masking the last three digits of the address.
To activate this facility (I’ve done it on my website), the following line of code needs to be added to the Google Analytics script:
google analytics tracking script
<!-- Global site tag (gtag.js) - Google Analytics -->
<script async src="https://www.googletagmanager.com/gtag/js?id=UA-136143601-1"></script>
<script>
  window.dataLayer = window.dataLayer || [];
  function gtag(){dataLayer.push(arguments);}
  gtag('js', new Date());

  gtag('config', 'UA-136143601-1');
  gtag('config', 'UA-136143601-1', { 'anonymize_ip': true });
</script>
Code 24.1 Anonymise IP with Google Analytic script
Add the line in green.
The number that is in there UA-13614306-1 is the tracking ID for the site, yours will be different, it is the same number given at the top of the Tracking ID page (Figure 24.45), make sure that you use the correct number.
24.4.5
Using Google Analytics
When you have put the Google Analytics script on all your published web pages, you will eventually start to receive data about your website (it takes a while, give it a couple of weeks, most of the first hits will be you looking at your own site). The following show some of the things Google Analytics can show you.
Where your users are:
Figure 24.47 Google Analytics — Geo location
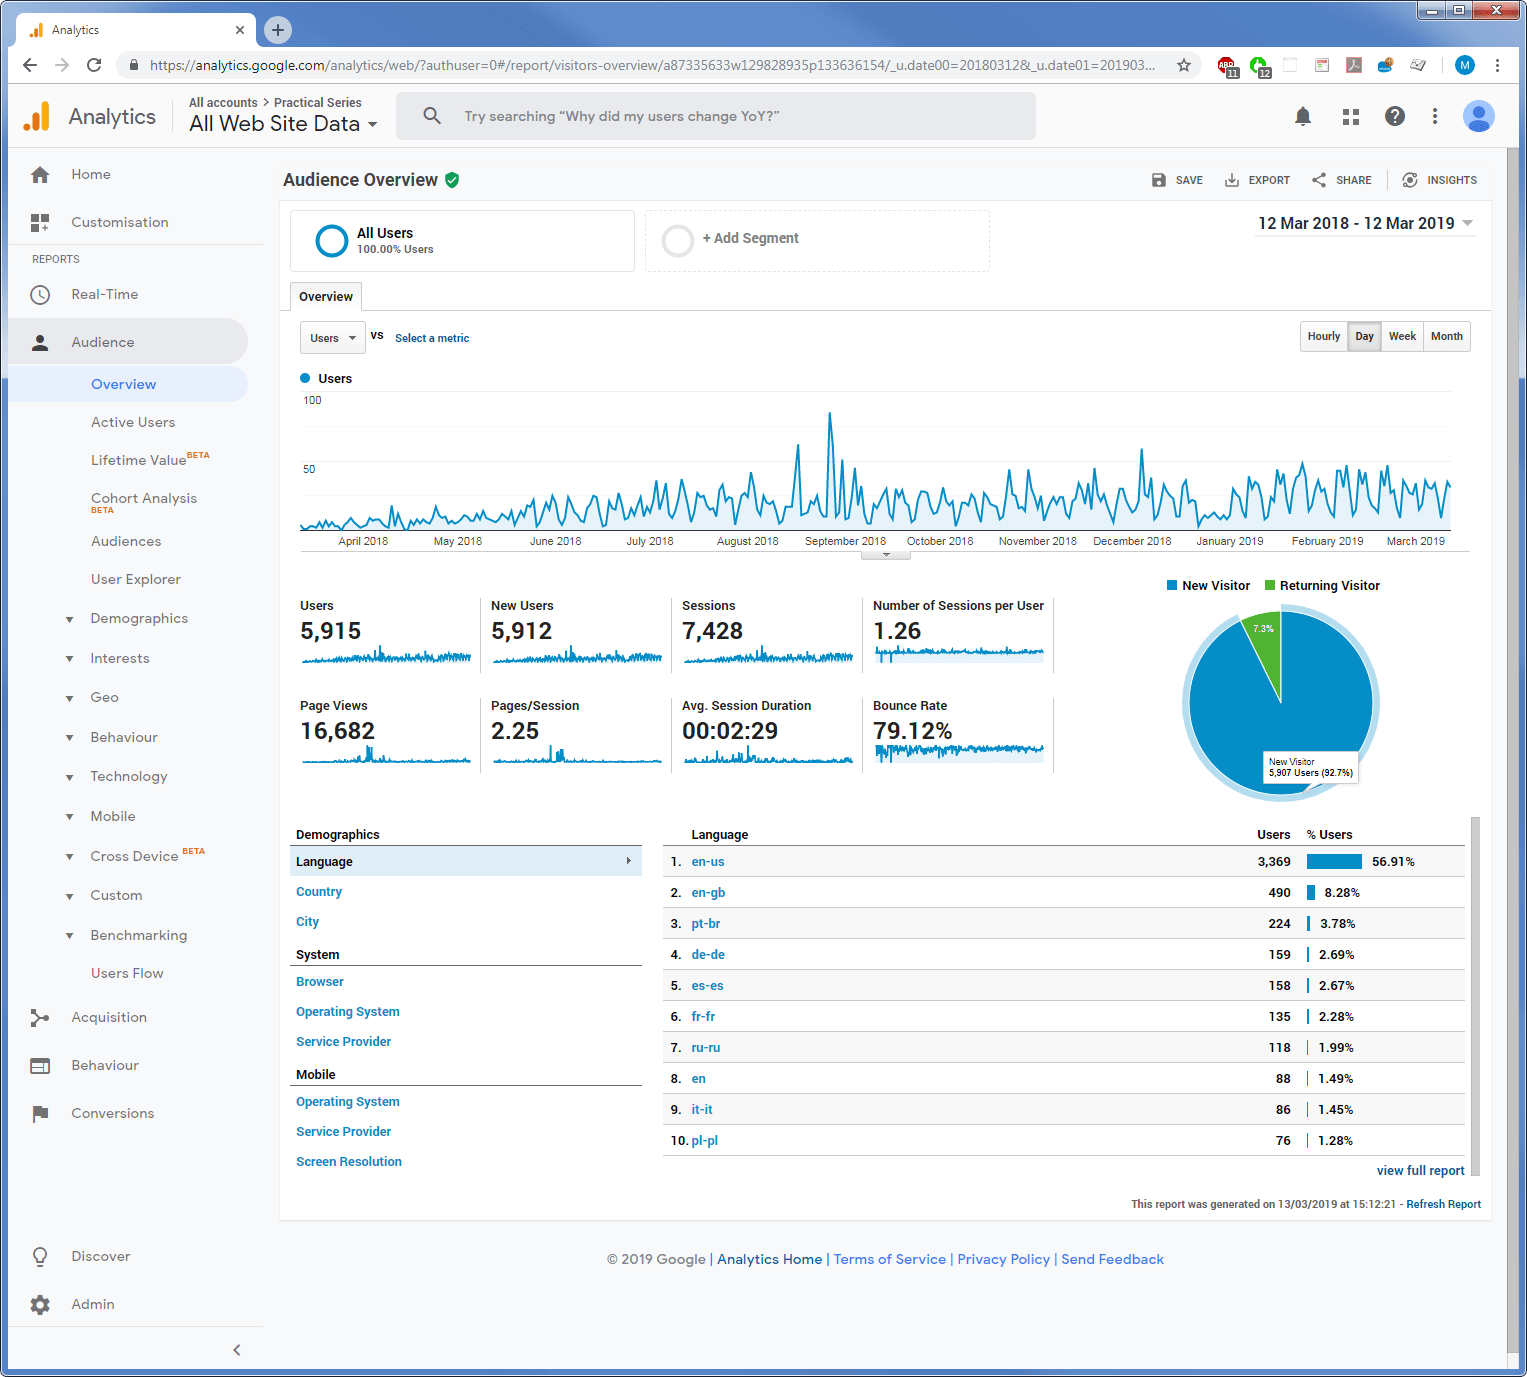
Users, sessions and page views:
Figure 24.48 Google Analytics — Users, sessions and page views
It can also show you what search query was entered into Google that led to your page:
Figure 24.49 Google Analytics — Search Queries
Google Analytics can be used for a lot of things, it is very configurable (and a bit complicated). I’m not that good at using it and there is a lot I don’t understand; but I hope I’ve given you a rough guide for configuring it and using it.