9
We’ve used tags quite extensively in the local repository using Brackets to create them. We’ve also seen that we can push these tags up to the GitHub repository (§ 8.3.2). They’re there now, you can see them.
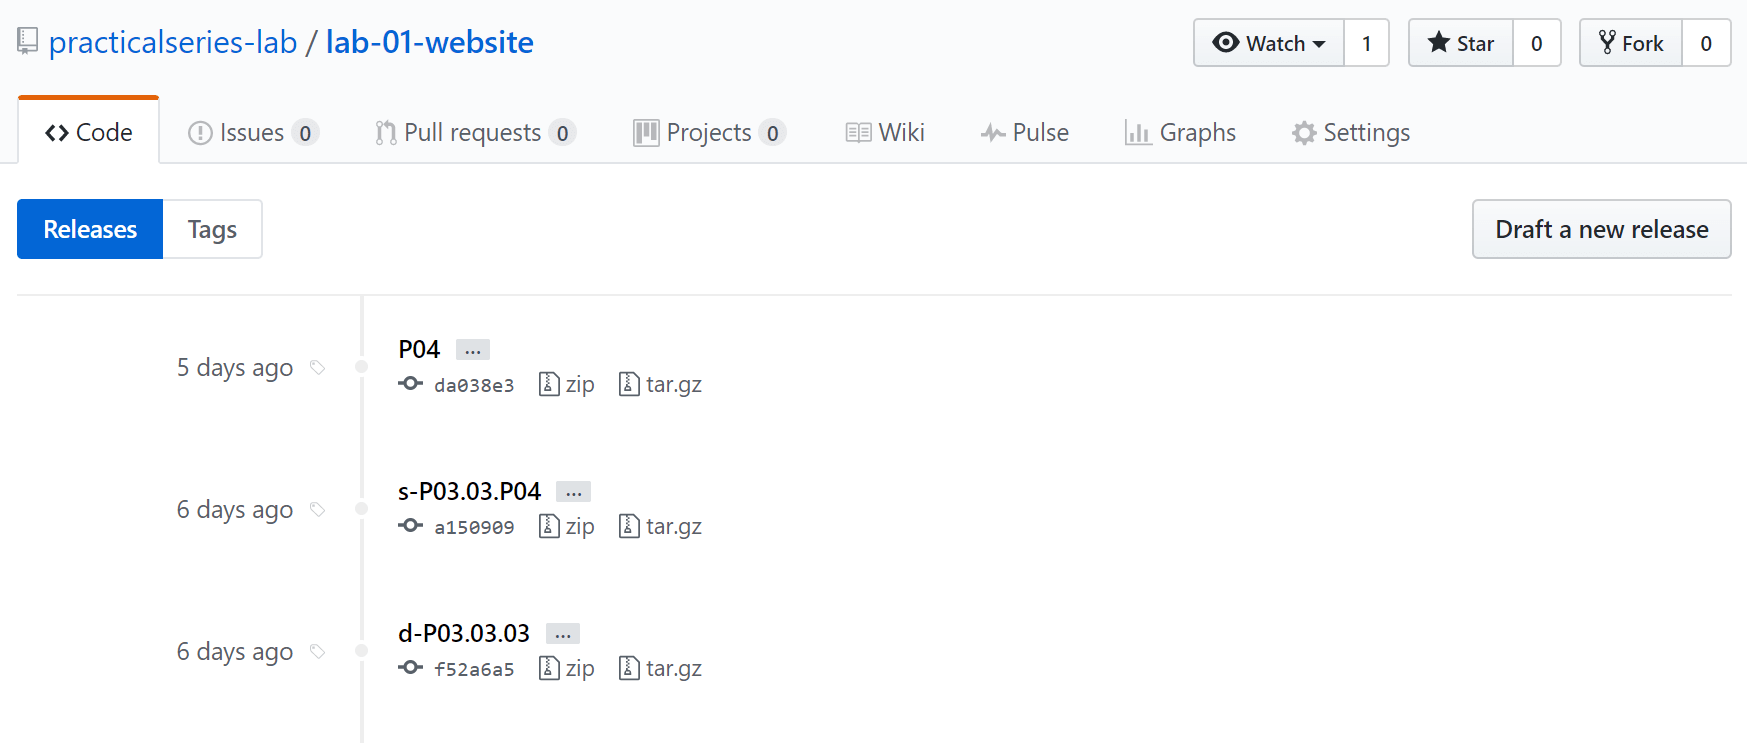
From the repository home page, click the releases tab:
This takes us to the release page:
This lists all the tags we entered in the course of the previous examples using Brackets (I’ve only shown the first three, there are 13 altogether).
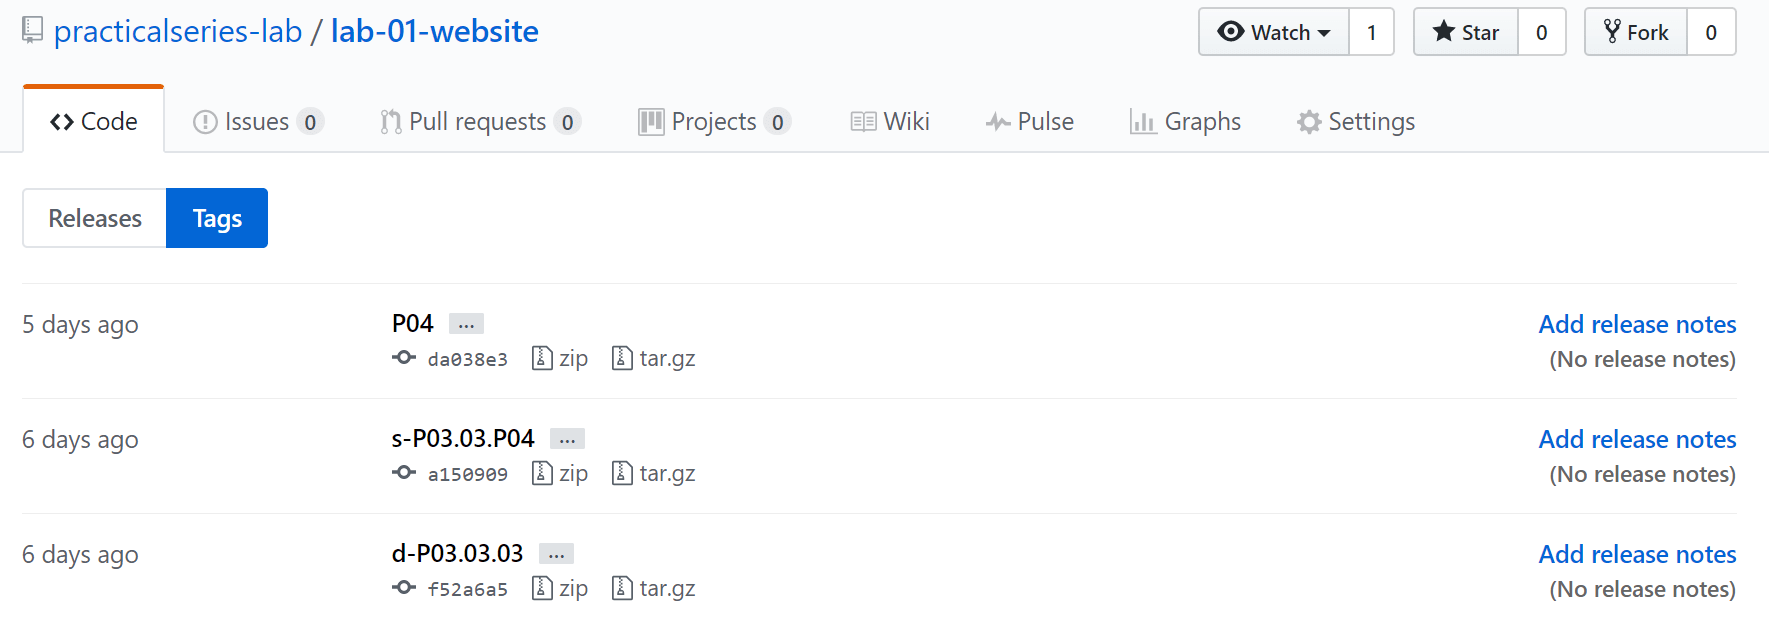
Now these are releases, not tags (see the blue button). If you click the tags button you get something very similar:
All the tags we created in Brackets show up in GitHub as both tags and release.
GitHub doesn’t really bother about tags—it accepts them because that is what is available in Git (and consequently Brackets). But it really wants us to use releases. GitHub doesn’t allow us to create tags directly, they have to be added by adding a release (although it can delete them directly).
So what’s the difference?
Well a tag is just a unique symbolic name attached to a particular commit point. Git supports two types of tag (§ 6.3.4) a lightweight tag (without a message) and an annotated tag (with a message). In Brackets we only have lightweight tags.
GitHub can display both. In Figure 9.82 above, the tags are all lightweight, I can tell this because it tells me there is for any of the tags, this release note is what Git refers to as the tag message attached to the annotated tag. If we added a release note it would become an annotated tag.
A release on the other hand is a GitHub object, it is still attached to a particular commit point, but this time it allows us to specify that a particular commit has a particular release status.
GitHub converts all our tags to releases when we push them up from the local repository and that is why they are listed as both releases and tags.
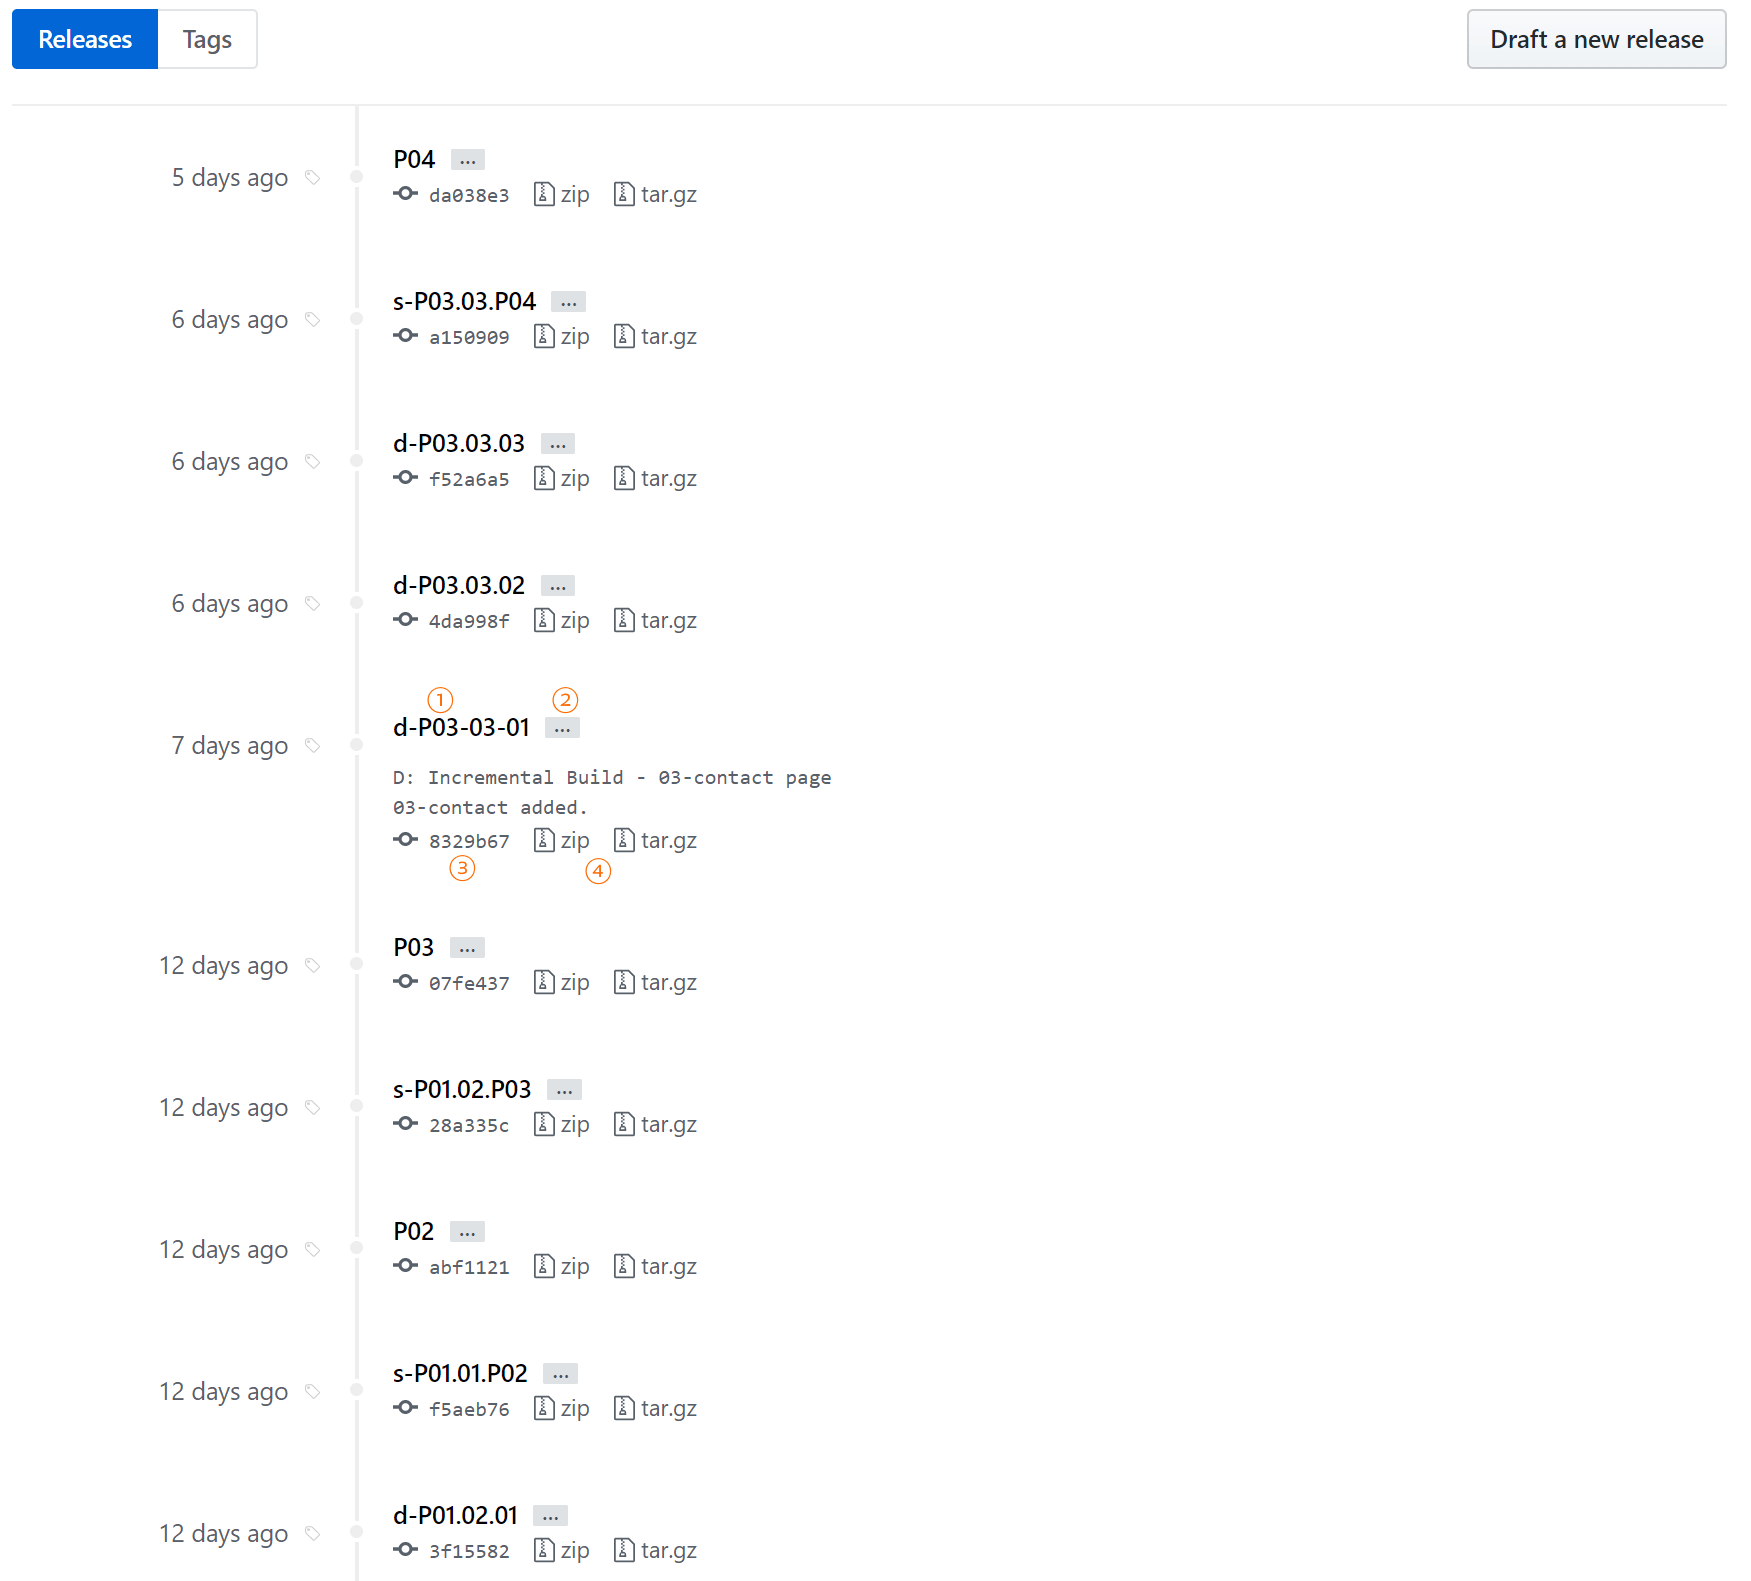
Let’s have a closer look at the releases page (I’m choosing release over tags, but the points in this section apply equally to both), this is an expanded version of Figure 9.81:
This shows the ten most recent releases (tags). Each release has four different link groups. The most simple is point 2, this just expands the commit message underneath the tag name (if the tag has an annotation or release note, it will show this instead).
Point 3 is the commit point to which the release (tag) is attached. If you click this it will take you to that commit point (just like the commit history § 9.4.2).
Point 4, the and †1 buttons download a copy of the repository exactly as it was at the time of the commit with which the release is associated, this is exactly the same as downloading it from the commit history (except the file is called <repository name>-<release name>.zip or .tar.gz).
This is a quick way to download the contents of a previous commit point; they’re all listed in the same place.
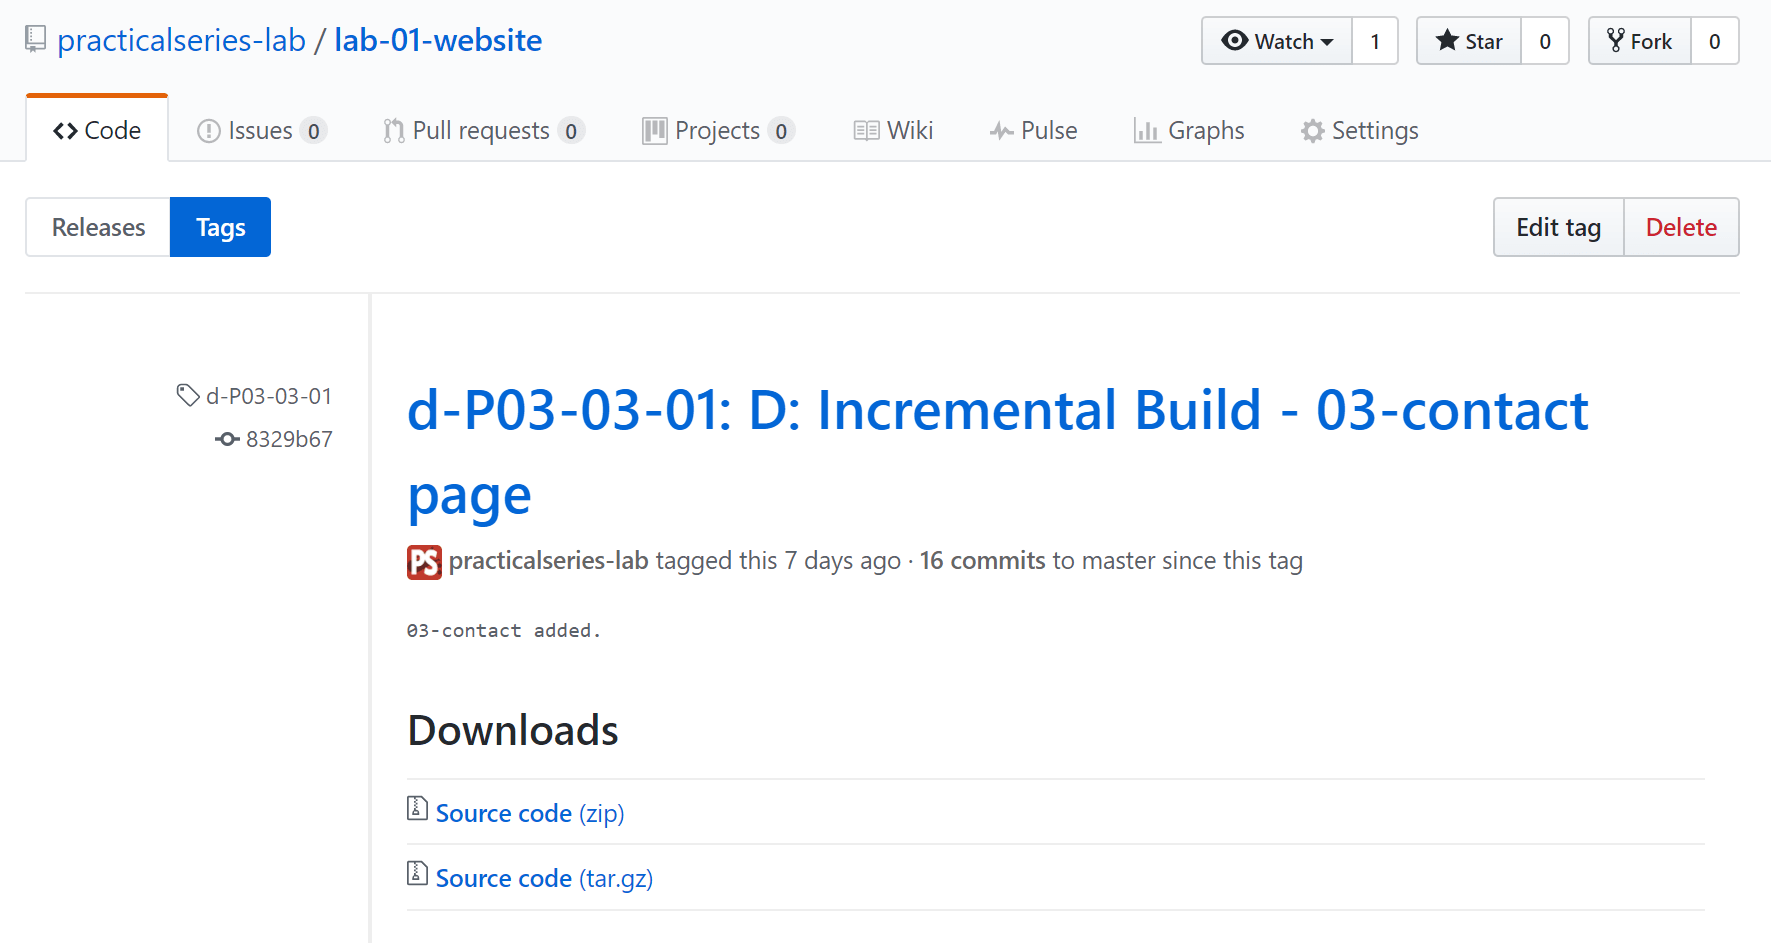
Finally point 1 (perhaps I should have numbered them differently). This takes us to the detailed tag information page (note: this is the underlying tag part of the release). It looks like this:
Clicking either the tag or the commit number in the left column will take you to that commit (again, just like the commit history § 9.4.2). The area just downloads the zip and tar files again.
The Figure 9.82.
button allows a release message to be added or if it already exists, edited—same as the add release notes inThe
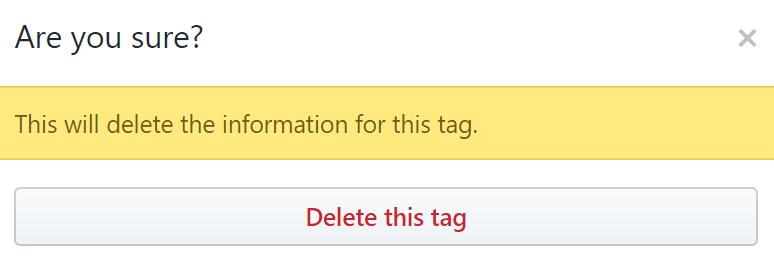
button, not surprisingly, deletes the tag. It pulls up an “are you sure?” box†1 | Tar.gz is a compressed archive (TAR is from UNIX, it stands for Tape ARchive)—similar to zip files, but common within Linux and Unix environments. The .gz extension indicates that it is a compressed file. Tar.gz files are often referred to as tarballs (tar from Tape ARchive and ball from the collective tar ball as in sticks things together—what can I say? Linux people). |
Go back to the releases page Figure 9.81) and click the button:
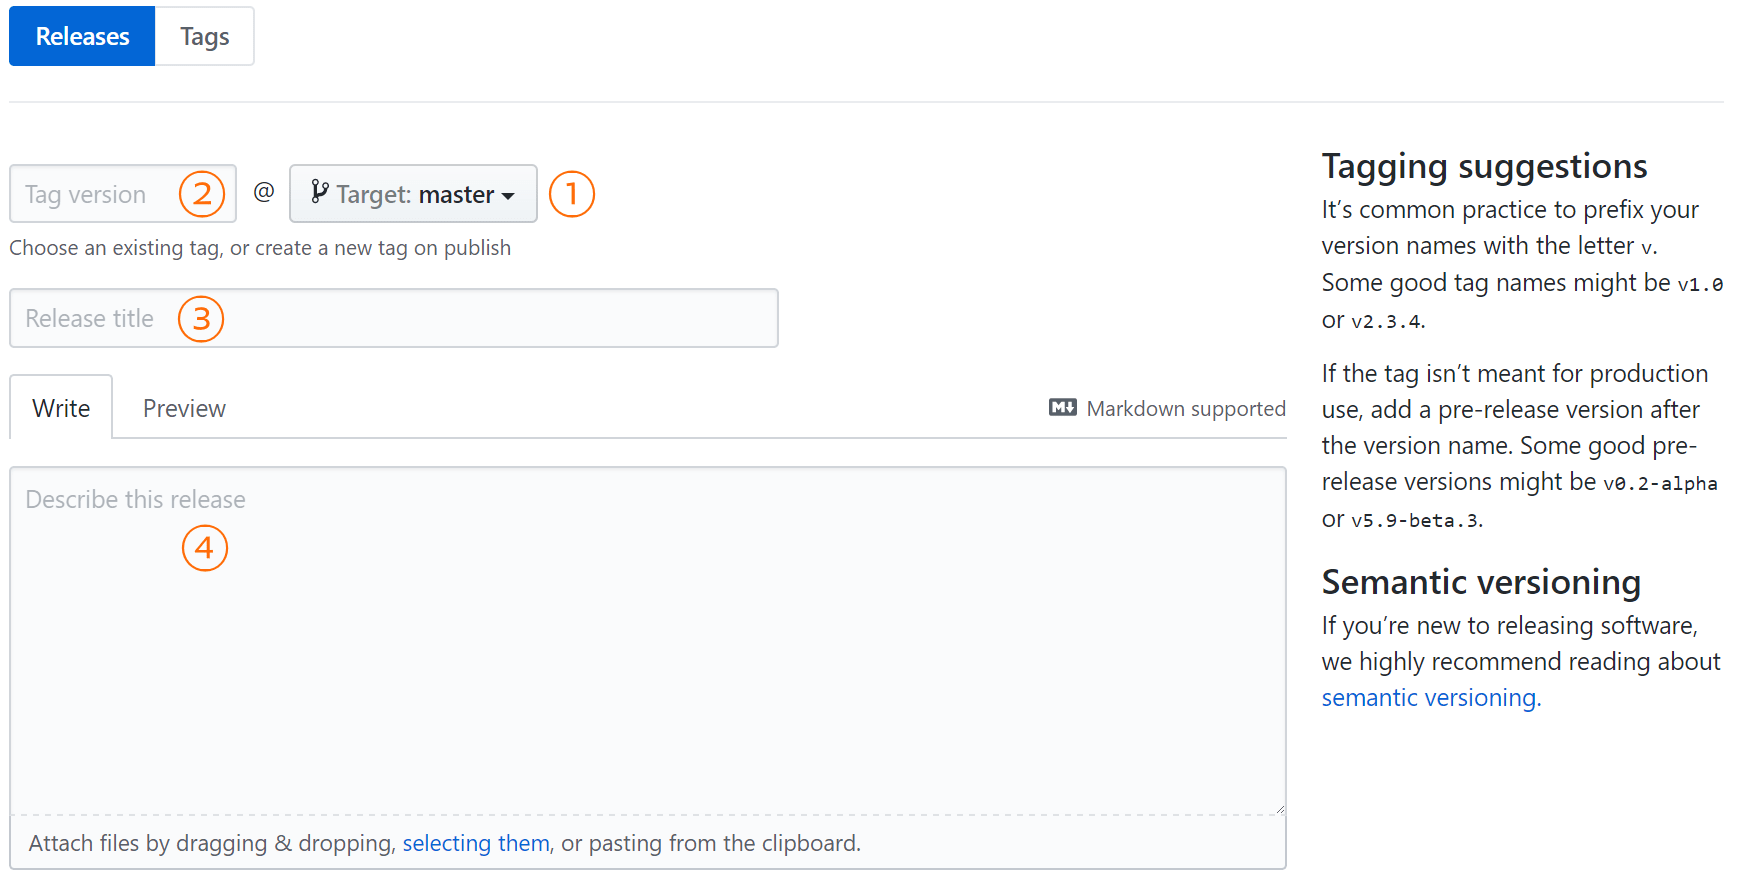
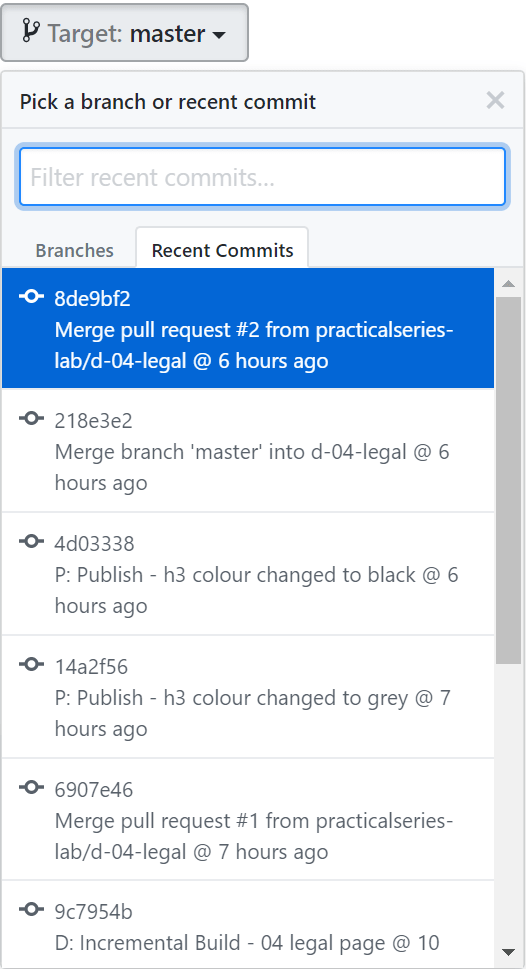
The main thing here is point 1, this is currently pointing to the head of the master branch [8de9bf2], it just says but that’s what it means (the head of the selected branch).
It’s possible to select lots of thing from this button:
If you click the
tab it gives a list of all the commit points in the project. This allows any commit point to be given a release (and a tag).Leave it set to the top commit [8de9bf2], we’ll tag the latest commit point.
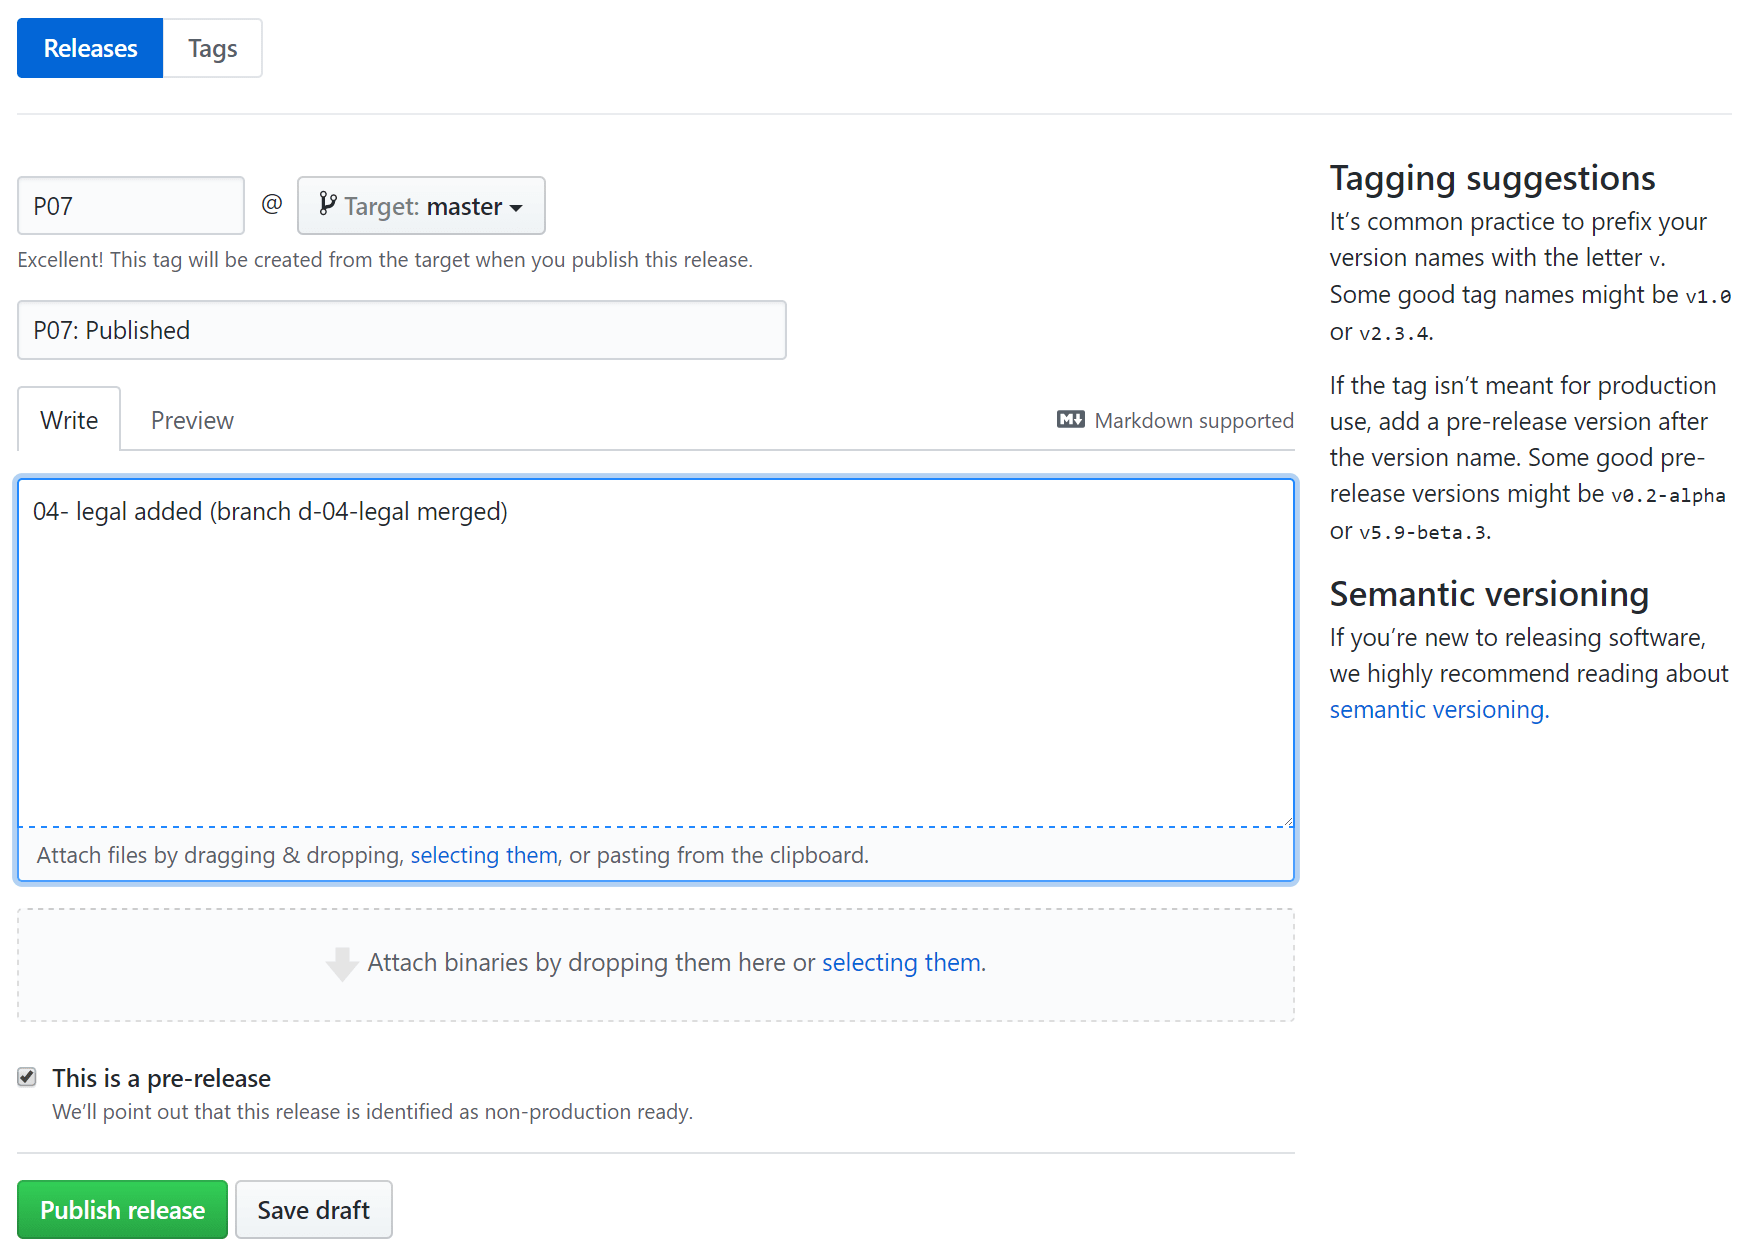
The next thing is point 2, this is the tag name, call it P07, it should look like this:
A release title can be added, point 3, and a description, point 4; both are optional.
There is also a
tick box, this again is optional, it affects how GitHub shows the release, if it is a pre-release (this one is), tick the box.The finished article should look like Figure 9.88. Click the button to complete the operation.
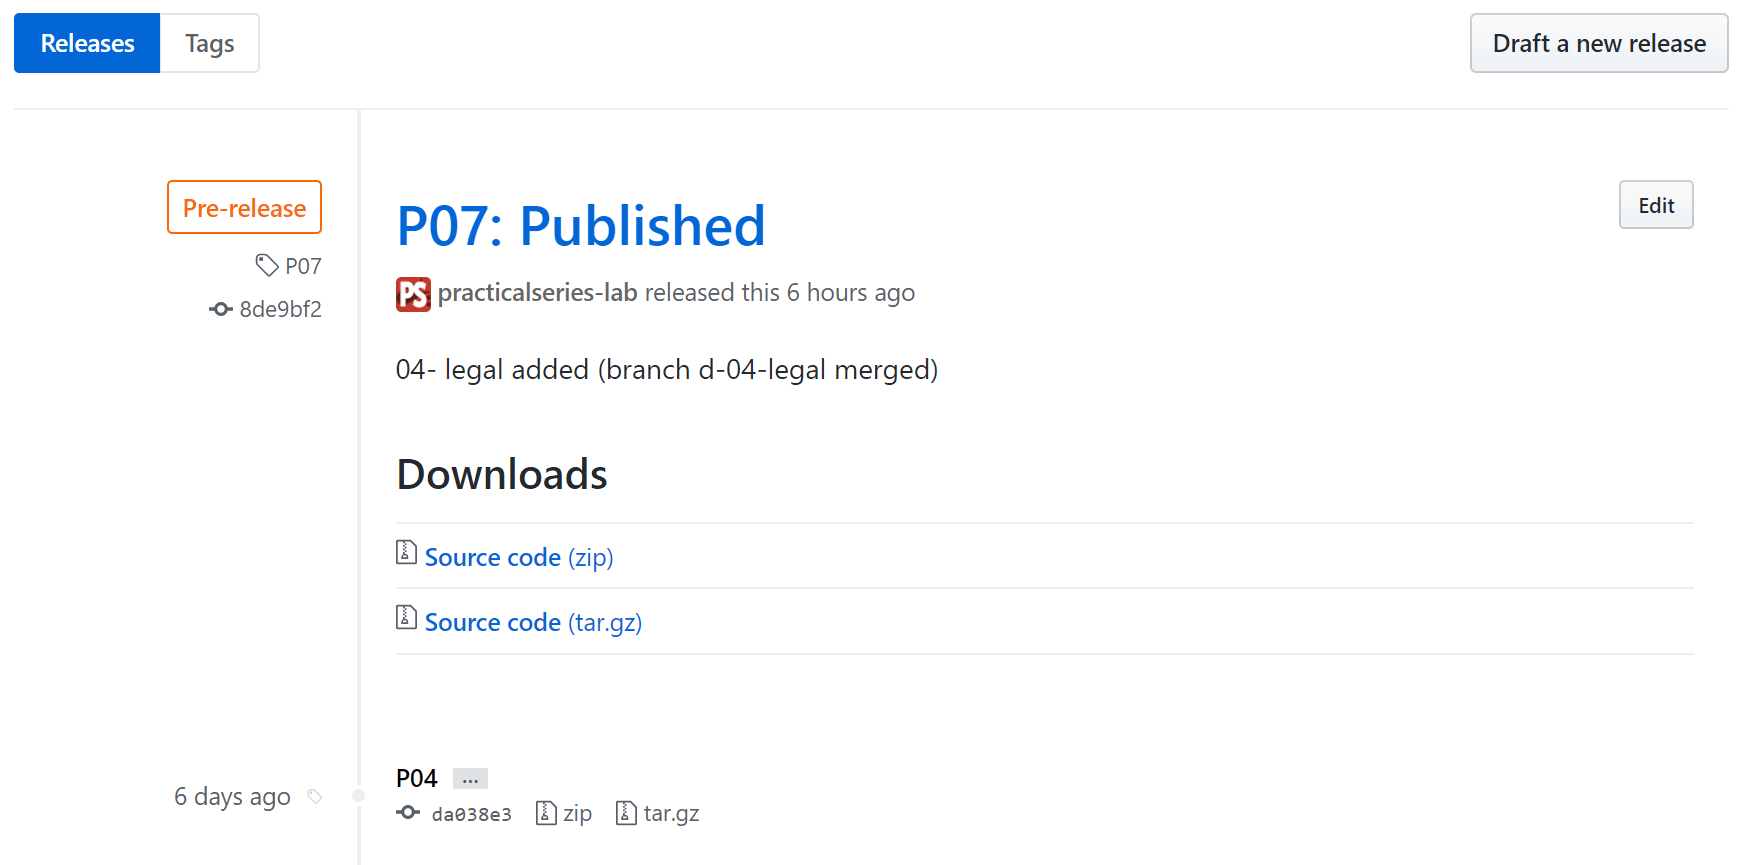
This takes you back to the releases page and it now looks like this:
It looks a bit more impressive than the ones we had before.
Go to the tags page and you will see we’ve added the release as a tag too:
There it is, if you pull this into Brackets, the new tag will be there too.
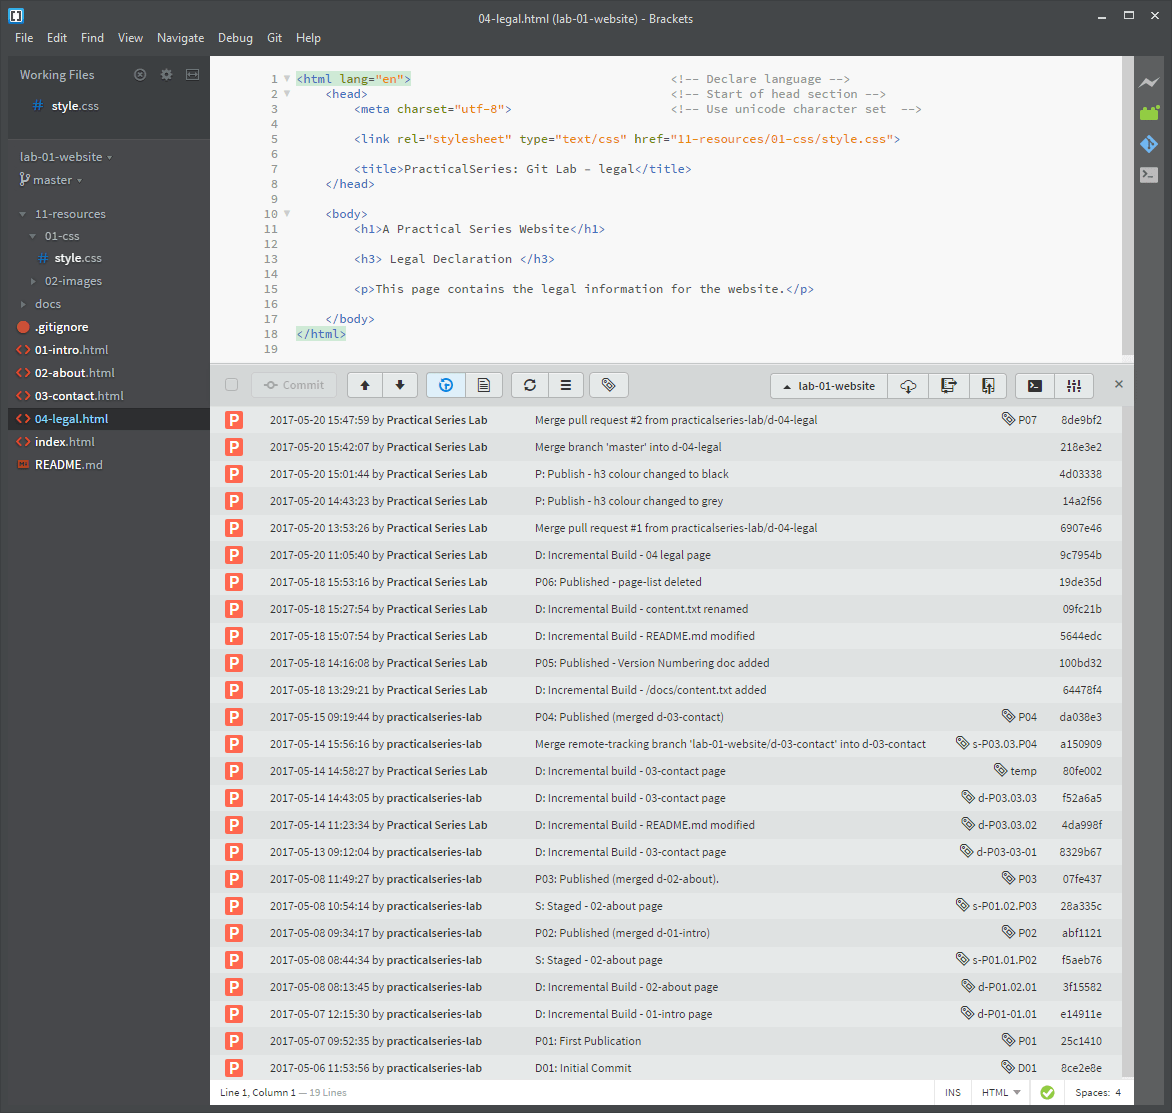
This isn’t strictly speaking to do with GitHub, but if we pull all the changes we’ve made back into Brackets we get this:
There it is, top of the list—P07, it appears as a tag.