5

5Git inside Brackets

5.4

Managing a repository with Brackets

Ok, we’ve cloned the GitHub lab-brackets-git repository to a local directory and we’re managing the repository with Brackets using the Brackets-Git extension.

The next thing we will do is modify the README.md file, add some folders (containing images), commit the changes to the master branch (the only branch we have at the moment) and then push all the changes back to the GitHub remote repository.

5.4.1

Creating a new folder in the repository

Make sure the lab-brackets-git project is open in Brackets; it should look like Figure 5.15.

Now right click in the left sidebar and select new folder (Figure 5.16):

Figure 5.16 - Create a new folder

Figure 5.16   Create a new folder

Call the new folder 11-resources. Now create another folder inside this new folder called 02-images (i.e. \lab-brackets-git\11-resources\02-images). This is just my convention for naming folders on a website—if you’re interested in the thinking behind it, I explain it here.

Externally from Brackets, copy the cover.png image (available here: a) into the new 02-image folder.

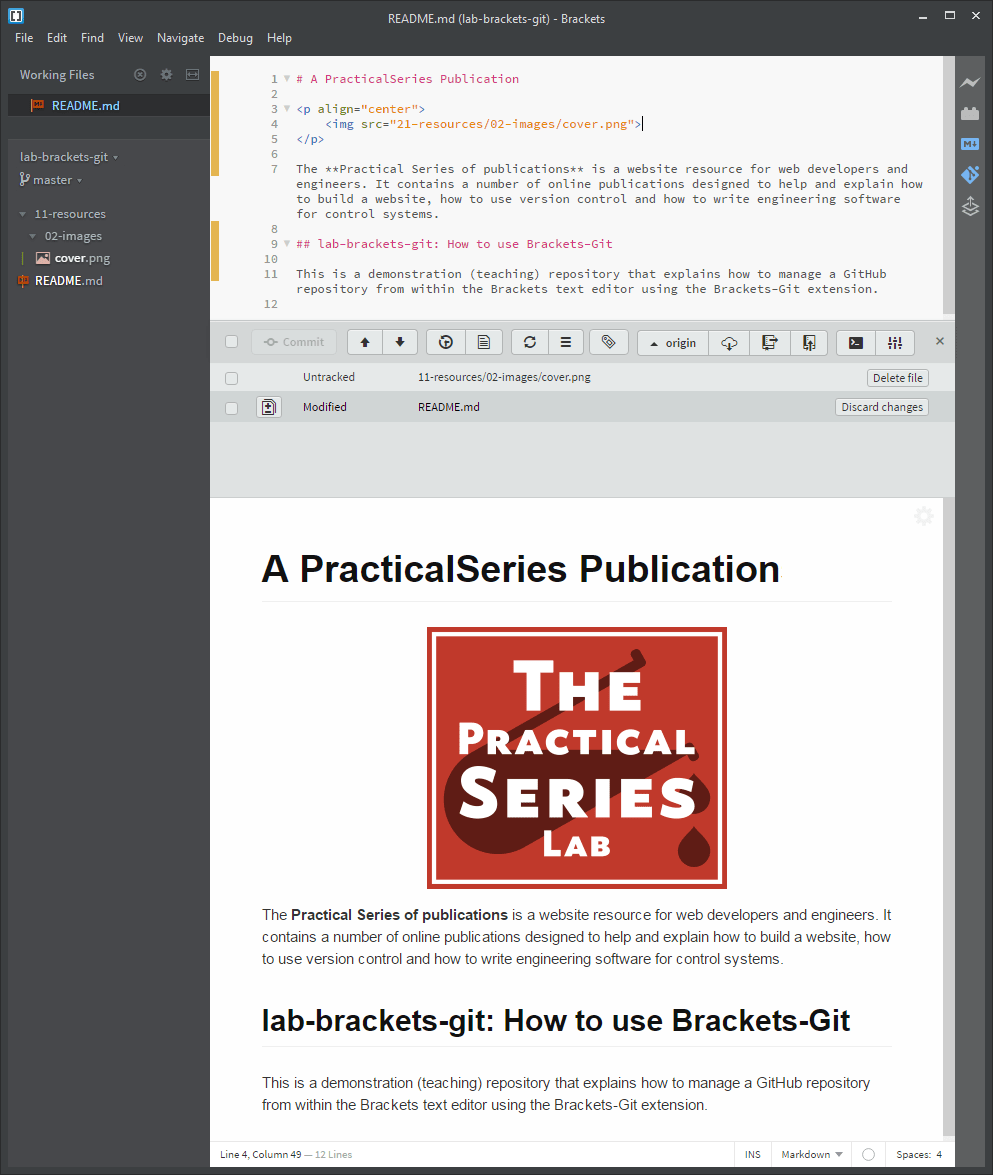
Back in Brackets the system should have detected the change and it will be showing it in the file tree (make sure the 11-resources and within it, the 02-image folders are expanded; just click them if they’re not). It should look like this, Figure 5.17:

Figure 5.17 - Examine the image

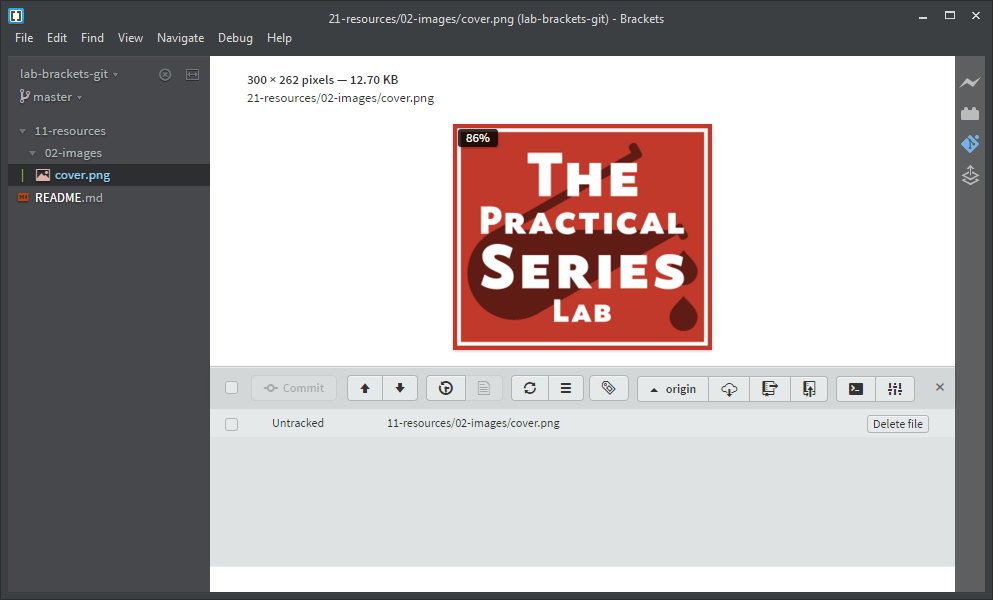
Figure 5.17   Examine the image

If Brackets hasn’t automatically refreshed (sometimes it doesn’t with networked files), right click the left sidebar and select refresh file tree or just hit f5. The Brackets-Git pane (light grey at the bottom) is now showing an untracked file. In my case:

Untracked   11-resources/02-images/cover.png

This is good, it means that Git has detected the file but doesn’t yet know what to do with it (it’s a new file as far as the repository is concerned).

5.4.2

Modifying a file

Now let’s modify the README.md file that GitHub created for us.

GitHub likes README.md files; it will automatically display the contents of it on the repository home page. The .md extension means the file is written in the markdown language.

Markdown is a simple text formatting language (markdown is actually a mark-up language—go figure), it uses standard keyboard characters to display headings, emphasis, lists &c. even basic HTML. GitHub uses a slightly enhanced version (called GitHub Flavoured Markdown) that can display code fragments and link to issues and users within GitHub. I give a summary of markdown and Git Flavoured Markdown in appendix c).

In Brackets, double click the README.md file to open it.

Replace the default text with the following:

README.md
# A PracticalSeries Publication

<p align="center">
    <img src="11-resources/02-images/cover.png">
</p>

The **Practical Series of publications** is a website resource for web developers and engineers. It contains a number of online publications designed to help and explain how to build a website, how to use version control and how to write engineering software for control systems.

## lab-brackets-git: How to use Brackets-Git

This is a demonstration (teaching) repository that explains how to manage a GitHub repository from within the Brackets text editor using the Brackets-Git extension.
Code 5.1   README.md file contents a

Click ctrl+s to save the file.

If you have the markdown preview activated (terminal icon), the README.md will be displayed as it will appear on GitHub at the bottom of the screen (Figure 5.18):

Figure 5.18 - Modify the README.md file

Figure 5.18   Modify the README.md file

In the Git pane, we now have two files listed that need attention:

Figure 5.19 - New and modified files

Figure 5.19   New and modified files

5.4.3

Committing the changes

The next thing to do is commit the changes (this accepts the changes and puts them in the local repository).

To do this, tick the boxes to the left of each file (or the single tick box at the top to select all) and click the commit button, it looks like this (I’ve highlighted the boxes and buttons):

Figure 5.20 - Staged files

Figure 5.20   Staged files

The Git commit dialogue box will open showing the changes (deletions in red, additions in green). Enter the following commit message:

Cover image added and README updated from default

Figure 5.21 - Git commit dialogue box

Figure 5.21   Git commit dialogue box

Click ok to accept the changes. The Git pane will now show :

Nothing to commit, working directory clean

This is exactly what we want; we have successfully modified the working files and committed them to the local repository.

5.4.4

Pushing the changes back to GitHub

The next thing is to update the remote repository on GitHub to match our local repository. This in GitHub terminology is called a push.

It’s easy to do from Brackets, just press the git push button: terminal icon

The number in brackets indicates the number of commits that will be pushed to GitHub (in our case, just one).

This opens the Push to remote dialogue box:

Figure 5.22 - Git push to remote dialogue box

Figure 5.22   Git push to remote dialogue box

Just click ok.

  • If you have previously logged in to a different GitHub account, you will be prompted to enter the username and email address of the repository you are trying to push to (in my case, practicalseries-lab and lab@practicalseries.com). I discuss this further in § 8.3.1. For now just enter your username and email address if asked.

After this you should get a successful Git push response (just click ok to close it).

Now go back to the GitHub website and navigate to the lab-brackets-git page (refresh it with f5 if you already have it open).

Figure 5.23 - Modified page in GitHub

Figure 5.23   Modified page in GitHub

Here we can see the changes we have made, the README file is being displayed with the changes we made in Brackets, there is a 11-resources/02-image folder and the cover.png image is being displayed on the README.md section.

If you’re seeing this, it’s worked.


End flourish image