I’m going to assume that you’ve already set up the SSH link between your computer and your GitHub profile (the instructions for how to do this are in § 4).
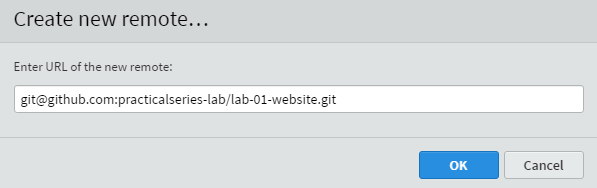
If you have, all we need is the SSH URL from the GitHub repository page (highlighted in orange in Figure 8.11). In my case it is:
Yours will be different, copy it from your account.
8.3.1
Linking Brackets to the remote repository
The SSH URL is all we need to make the link—back to Brackets.
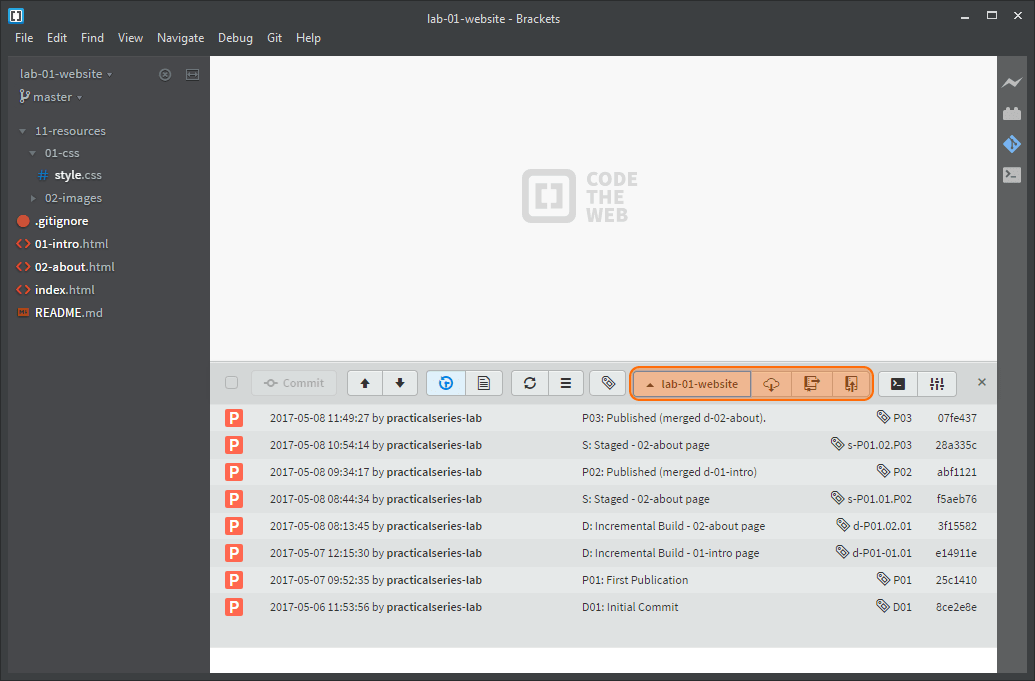
We have to tell Brackets about the remote repository. There is a button for this on the Git pane; it looks like this it says pick preferred remote if you hover the mouse over it. I’ve highlighted its position in Brackets in Figure 8.12:
Click it and select create new remote from the dropdown (shown above). This opens the create new remote dialogue box:
Figure 8.13 Create new remote dialogue box 1
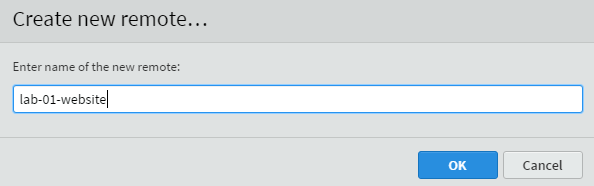
This is asking for a name for the remote, call it lab-01-website. Click ok.
The name I’ve used here lab-01-website, is the name of the remote link, this is usually called origin—I discussed this in § 2.9.5. It doesn’t matter; you can use origin if you want.
Git uses origin by default, Brackets doesn’t presume and you will always have to enter a name—hence I use the name of the repository.
Now it wants the information we copied from the new repository in GitHub.
Paste the information in and click ok.
Figure 8.14 Create new remote dialogue box 2
This activates the remote fetch, pull and push buttons on the Git pane:
Figure 8.15 Brackets—remote repository buttons
8.3.2
Pushing the local repository to the remote repository
At this point we’ve set up the link to the remote repository, but nothing else has happened we haven’t done anything with the remote repository; we haven’t even connected to it yet. We’ve just given the connection details to Brackets.
The next thing to do is send (push) the local repository up to the remote.
Make sure you are on the master branch and click the git push button on the Git pane: .
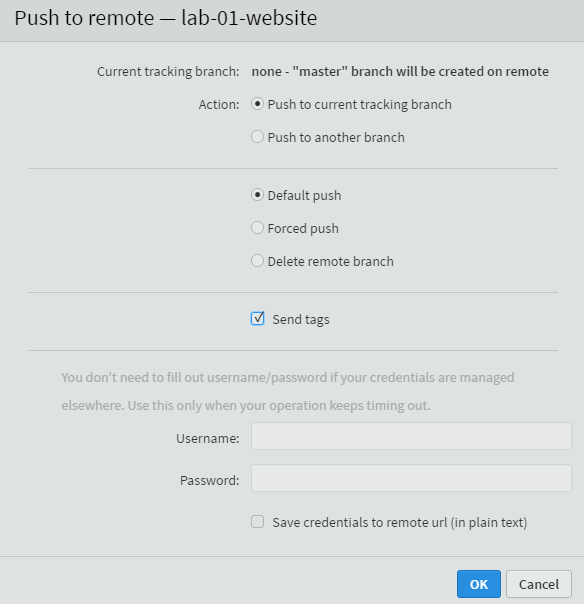
This opens the push to remote dialogue box:
Figure 8.16 Brackets—push to remote dialogue box
We’ve seen this screen before in section 5.4.4 with the lab-brackets-git repository. Let’s look at in a bit more detail.
The first line current tracking branch tells us it will create a new master branch on the remote. The action is to push to this branch (this is what we want; it would be confusing to push the local master branch to a different remote branch). We also want to do a default push. There is no reason to do anything else.
The only thing we need to change is the send tags tick box, tick it; we want to send our tags to the remote repository.
There is no username or password to enter, we are using SSH as the link protocol and that does not need a username and password (see § 4.3).
Click ok.
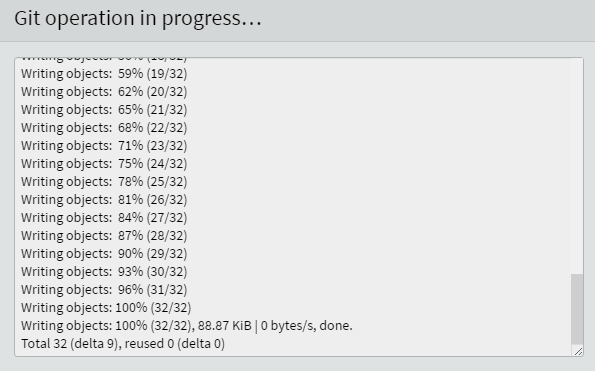
A couple of things happen next; first you (briefly) get a screen showing the progress of the operation:
Figure 8.17 Brackets—push to remote dialogue box, operation in progress
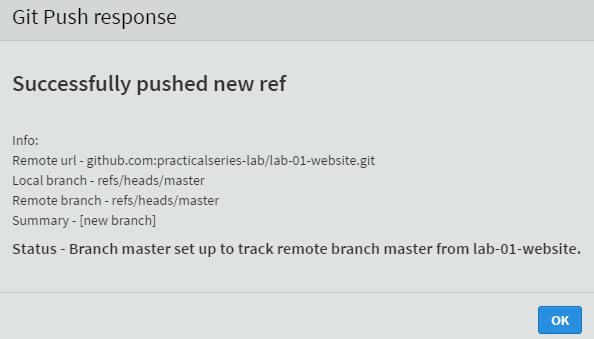
And after this the response screen:
Figure 8.18 Brackets—push to remote dialogue box, result
Well it looks ok, it says “successfully” so that’s good. It also says the local branch master is tracking the remote branch master. This just means it will report if there are changes to the remote master branch that have not been incorporated into our local repository.
Everything seems ok so close the dialogue box.
Now go back to GitHub and navigate to the lab-01-website repository (if you already have it open, refresh the page by pressing f5). It looks a bit different.
I don’t want to run through too many of the GitHub features here, I do that in section 9 and section 10; but there are somethings we need to look at. They’re all in the tab bar:
Figure 8.20 GitHub—tab bar
Starting on the left at the top. It says we have 8 commits. This is because we have only pushed the master branch and that only had eight commits on it (Figure 8.15). If you click the commits tab it lists all the commits on the branch:
Figure 8.21 GitHub—commits tab
These match the commits on the master branch workflow (exactly the same hash numbers).
Go back to the main repository screen (click the /lab-01-website at the top of the page under the black bar with the Octocat icon).
Looking at the branches tab it says there is 1 branch, this is the master branch. The local repository has two branches, but the remote repository only has one. Why?
The answer is that when we do a push from Brackets (or indeed from the Git command line) it only pushes a single branch—if no specific branch is given, it pushes the currently active branch. In our case this was the master branch; and that is why there is only one branch in the remote repository, we haven’t pushed the second branch yet.
Click the branch tab, it just shows just the single master branch.
Figure 8.22 GitHub—branches tab
Next is the releases tab , this lists the tags we passed to the remote repository:
Figure 8.23 GitHub—releases tab
These are all the tags that were entered as we created the local repository.
There is a slight discrepancy between what Brackets (and Git) call a tag and what GitHub calls a tag (you can see our tags are classed as both tags and releases in GitHub, click where it says tags next to the blue releases button), you will see the same list. Bear with it for now, I explain it more fully in § 9.6.
Finally, the contributor tab . There is only one contributor, me:
Figure 8.24 GitHub—contributor tab
The contributor page has a lot of statistics and information in it—most of it is self-explanatory and we don’t need to go through it here.
There is one final thing, go back to the repository home page and look at the coloured bar under the tabs, Figure 8.20. It’s red and purple. Click it:
Figure 8.25 GitHub—code breakdown
It shows a breakdown of the code within the repository 66% HTML, 34% CSS. HTML is shown in red; CSS in purple—other languages have other colours. Click the bar again to get back to the tabs.
8.3.3
Pushing another branch to the remote
Back to Brackets. Let’s push the d-03-contact branch up to the remote repository.
First switch to d-03-contact, click the small arrow next to the master branch and select d-03-contact from the dropdown. It should look something like this:
Figure 8.26 Brackets—switch to the d-03-contact branch
This time we have a number alongside the git push button , this number means that the current branch d-03-contact has one extra commit that needs to be pushed to the remote repository; indeed there are nine commits listed in the commit history (Figure 8.26) and we know that the remote repository only has eight commits (Figure 8.21).
Click the git push button:
Figure 8.27 Brackets—push the d-03-contact branch
In the push to remote dialogue box make sure the send tags option is ticked and click ok.
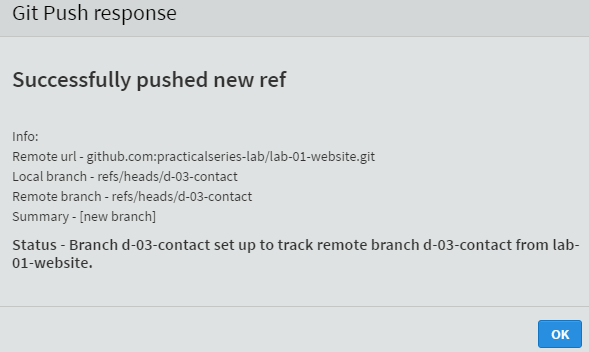
Again we get the successful response screen:
Figure 8.28 Brackets—push response
This time we are told the branch d-03-contact is now being tracked.
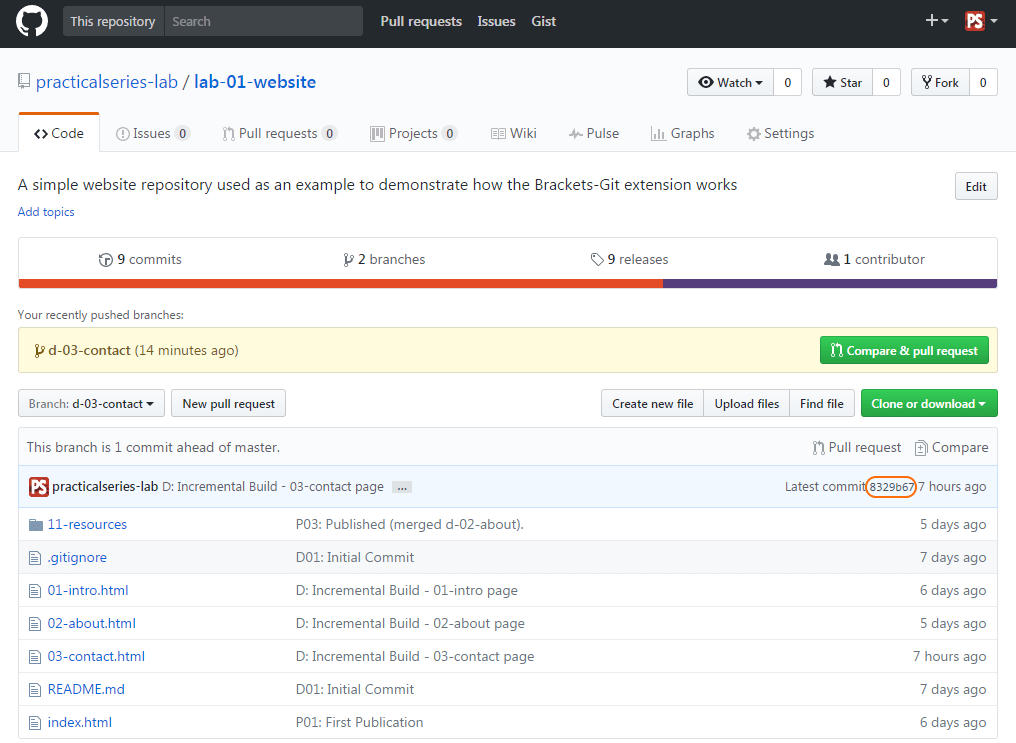
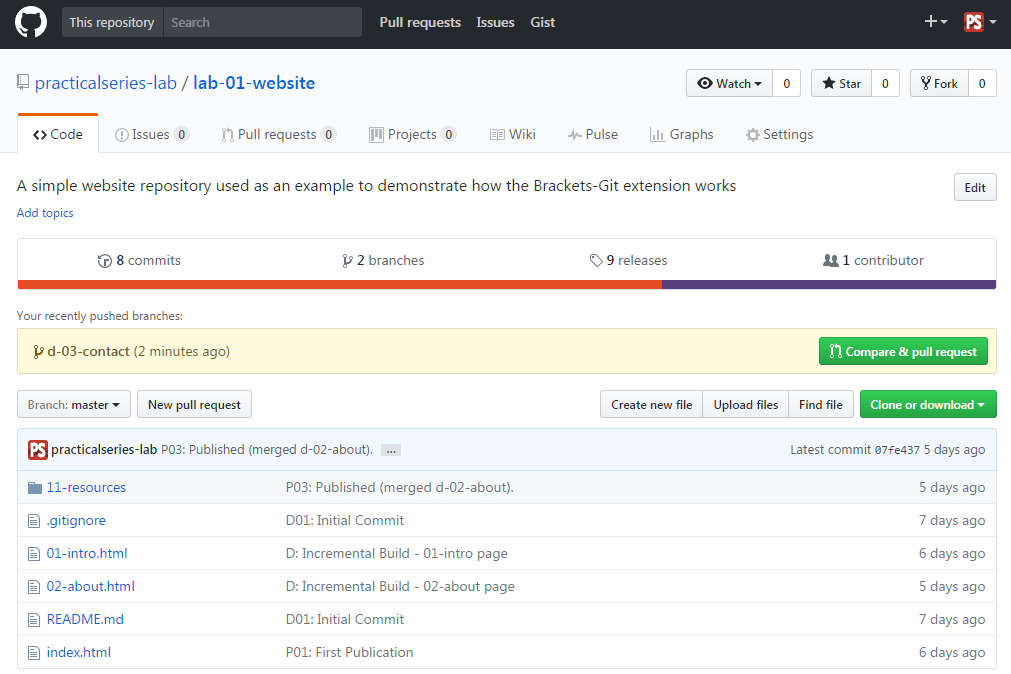
Let’s go look at in GitHub. You should have something like this:
Figure 8.29 GitHub—after the addition of a second branch
It’s telling us that the new branch d-03-contact has been added (pushed), that’s the bit in yellow. We can also see that there are two branches.
It’s only showing eight commits though—this is because we are still on the master branch. You can see the current branch; it’s listed in the branch button: .
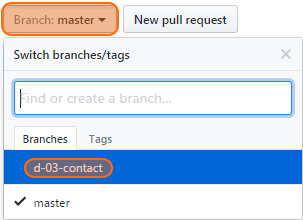
To change the active branch, click the branch button:
Figure 8.30 GitHub—switch branches
Select the branch you want from the list, d-03-contact in this case.
This gives us:
Figure 8.31 GitHub—on the d-03-contact branch
The 03-contact.html file is there and the latest commit [8329b67] is also shown (in the pale blue line about halfway down) so it looks like it’s worked.
 it says if you hover the mouse over it. I’ve highlighted its position in Brackets in Figure 8.12:
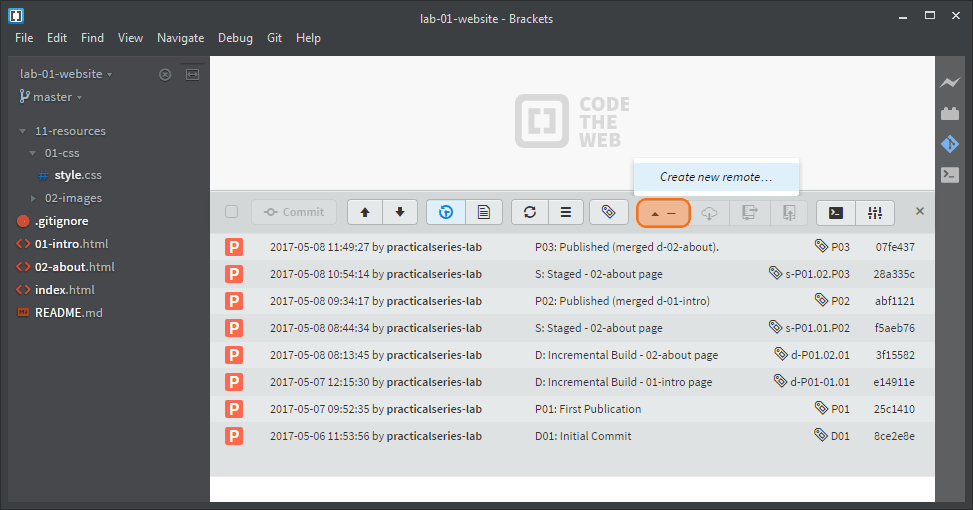
 .
.


 it lists all the commits on the branch:
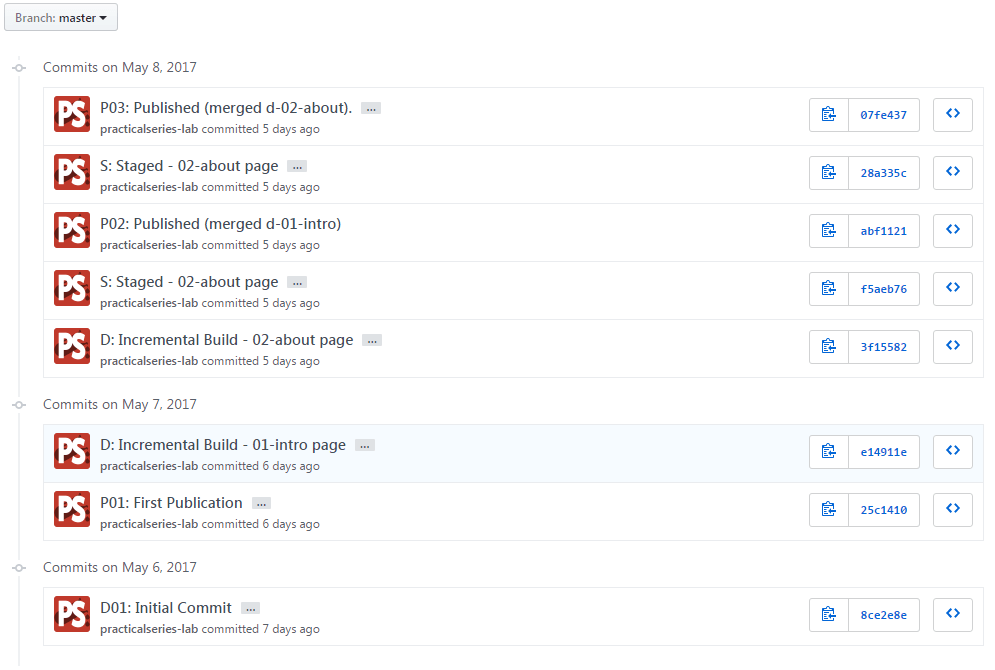
 it says there is
 , this lists the tags we passed to the remote repository:
 . There is only one contributor, me:
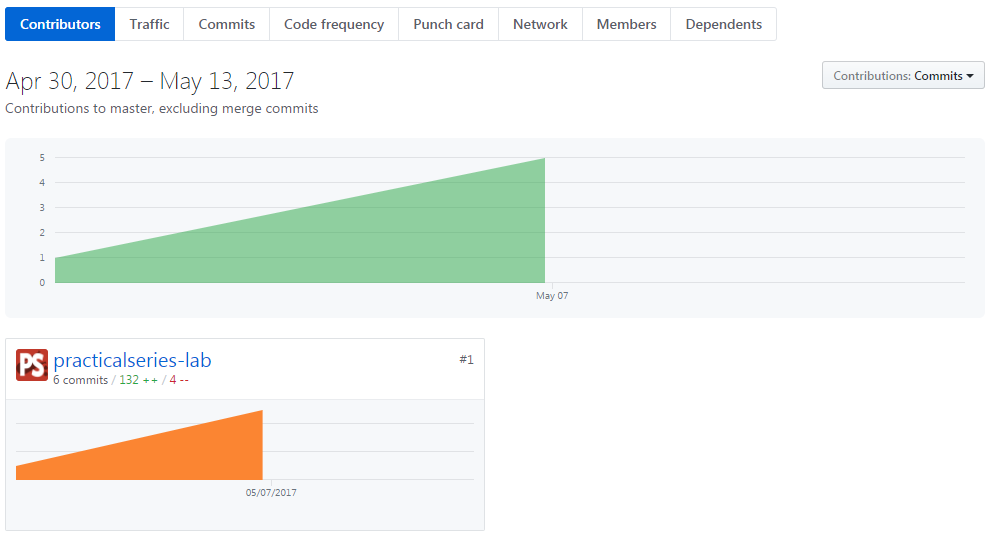


 , this number means that the current branch
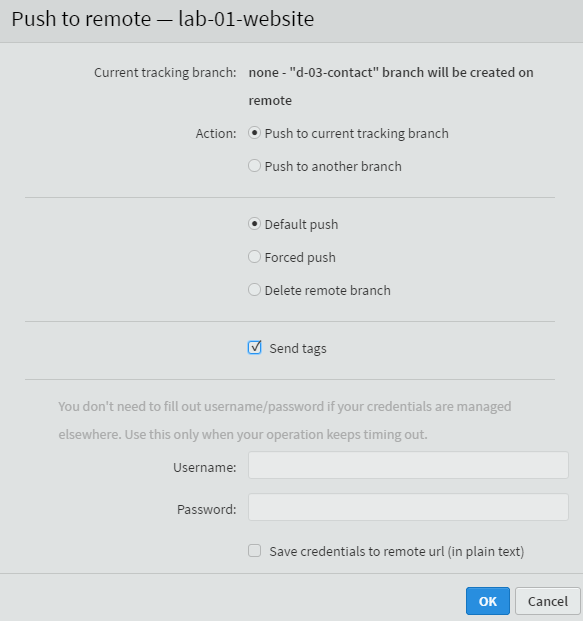
 .
.