21

21Displaying code fragmentse

21.2

Loading and understanding Google Prettify

This is in two parts, the first bit is how to start Google Prettify on a web page and what options to use, the second bit explains how to display code fragments.

21.2.1

Loading the Google Prettify JavaScript

You’ve probably already guessed, but we run Google Prettify with a <script> element in the <head> of the HTML, just like all the other plugins, here it is:

Loading Google Prettify html
<html lang="en">                              <!-- Declare language -->
    <head>                                    <!-- Start of head section -->
        <meta charset="utf-8">                <!-- Use unicode char set-->

<!-- **************************************************************************
     HEAD SCRIPT AREA
     ***********************************************************************-->
       <script src="https://ajax.googleapis.com/ajax/libs/jquery/3.3.1/jquery.min.js"></script>
       <script src="21-global/05-js/jquery.waypoints.min.js"></script>
       <script src="21-global/05-js/hyphenator.js"></script>
       <script src="21-global/05-js/lightbox.js"></script>
       <script src="21-global/05-js/run_prettify.js?autoload=true&lang=css"></script>
       <script src="11-resources/05-js/script.js"></script>
       <script src="01-pages/99-00-typicals/05-local-js/99-00-scroll.js"></script>

<!-- **************************************************************************
     HEAD CSS LOAD
     ***********************************************************************-->
       <link rel="stylesheet" type="text/css" href="21-global/03-fonts/ps-fonts.css">
       <link rel="stylesheet" type="text/css" href="21-global/01-css/normalise.css">
       <link rel="stylesheet" type="text/css" href="21-global/01-css/lightbox.css">
       <link rel="stylesheet" type="text/css" href="11-resources/01-css/grid.css">
       <link rel="stylesheet" type="text/css" href="11-resources/01-css/style.css">
<!-- **************************************************************************
     TITLE
     ***********************************************************************-->
        <title>Website template typicals | PracticalSeries: Web Development</title>
    </head>
Code 21.1   Loading Google Prettify

Now this is a bit different to the JavaScript files we’ve loaded, it has parameters:

<script src="21-global/05-js/run_prettify.js?autoload=true&lang=css"></script>

The first bit 21-global/05-js/run_prettify.js is OK, it just loads the run_prettify.js file from within our website, same as all the other JavaScript we’ve loaded.

But then we get a question mark (?) followed by a load of other stuff:
autoload=true&lang=css.

This drove me mad. I could just say it’s a way of passing parameters to a JavaScript file (which it is, sort of) and you would probably believe me and we could all just carry on living our lives in ignorant bliss.

But no, I had to digging.

Sigh. So here’s the rant

All I can say is:
“Fucking. Fuck. Fuck. — Fucking Linux People. — Fuckers. — You should all be shoved up your own felching†1 GNU”.

Sigh.

†1 Felcher [noun, slang] A well-established term in the Engineer’s Lexicon of Insults. Usually reserved for project managers. Er... if you are of a squeamish nature, I shouldn’t look it up.

It turns out that the question mark isn’t doing anything at all, it is just a separator that has no special meaning in HTML, it treats the question mark just as if the line was <script src="21-global/05-js/run_prettify.js"></script>; it doesn’t know what to do with the ? so it ignores the it and everything after it.

So how does it work?

Well, the HTML just runs the JavaScript file run_prettify.js, this file then goes looking for its own call in the HTML, remember we can look up any element with jQuery so it goes off and looks up a script element that has the string run_prettify.js in it (i.e. it finds itself in the HTML code, it’s a bit like bending over and looking up your own fundament). It then looks for the question mark and copies everything after it (up to the last quote) into a string variables inside itself.

Once it’s done this, it can search the string and separate out the different parameters, each parameter is separated by an ampersand (&). It identifies each parameter, stores it in separate variables or an array and then performs some action based on the value of the parameter.

The HTML doesn’t actually pass anything into the file, in fact HTML is incapable of doing this, it just doesn’t have the facility. All we’ve done is add some stuff after the filename that is completely ignored by the HTML.

The JavaScript, once it is called goes sniffing for the stuff at the end of the filename, interprets what’s there and does something with it.

OK, I can see this is quite clever. It is an ingenious way of getting additional data in to JavaScript file and I have a sneaking admiration for whoever thought of it.

However, there is no explanation of this anywhere. The internet is a big place, and while I could find some hints and few oblique references, I couldn’t find a proper explanation. I had to work it out for myself.

I appreciate that figuring things out is character building, but why is this information a secret? Surely someone could explain these things?

I blame the FLPs†2.

†2 Fucking Linux People — I’ve promoted them.

21.2.2

The Google Prettify JavaScript parameters

The Google Prettify run_prettify.js is designed as an all-in-one package, it loads everything it needs (even the CSS file) and gets on with the job. We tell it what we want it to do by the string that follows the question mark in the <script> element:

<script src="21-global/05-js/run_prettify.js?autoload=true&lang=css"></script>

There are three main options:

Parameter Default value Function
autorun=[true,false] True Automatically runs Google Prettify when the page has loaded. If set to false, the function must be manually triggered
lang=[name] None Loads the language handler for the specific language (what follows the equal sign). It will load a language file called lang-[name].js from the 21-global/-05-js/google-prettify directory
skin=[name] None Loads an alternative CSS file to replace prettify.css. If the skin parameter is not present, prettify.css will be loaded by default. If present, the parameter will load [name].css from the 21-global/-05-js/google-prettify/skins directory
Table 21.1   Google Prettify common parameters

In the <scrip> element, the first parameter is precede with a question mark (?), each subsequent parameter is separated from the next with an ampersand (&).

Thus in our case I have the following parameters:

autorun=true

lang=css

I do not load a skin CSS file, I have changed the default prettify.css file to give me what I want.

If you want more than one language file, just repeat the lang parameter, e.g.:

?autoload=true&lang=css&lang-vb

Would load both the CSS language and the Visual Basic language.

21.2.3

Loading the Google Prettify JavaScript

Google Prettify can interpret certain language by default. These languages are built in and do not need separate lang-[name].js files. Google Prettify. The default languages are:

language Prettyprint Class
Bash and shell languages lang-bash
lang-bsh
lang-csh
lang-sh
C, C++, C# lang-c
lang-cpp
lang-cs
Coffee Script lang-coffee
HTML lang-html
Java, JavaScript, JSON lang-java
lang-js or lang-javascript
lang-json
Perl lang-pl
lang-pearl
Python lang-py or lang-python or lang-cv
Ruby lang-rb or lang-ruby
XML, XSL lang-xml
lang-xsl
Table 21.2   Google Prettify built in (default) languages

All these language are present without using the lang= parameter in the script element.

Other languages have to be loaded (with the use of the lang= parameter) before they can be used. CSS is one of these, hence that is why it is in my Google Prettify script element.

The following languages are available:

language File(s) Script Parameter Prettyprint Class
Apollo lang-apollo.js
lang-aea.js
lang-agc.js
lang=apollo
lang=aea
lang=agc
lang-apollo
lang-aea
lang-agc
Basic lang-basic.js lang=basic lang-basic
Clojure lang-cl.js
lang-clj.js
lang=cl
lang=clj
lang-cl
lang-clj
CSS lang-css.js lang=css lang-css
Dart lang-dart.js lang=dart lang-dart
Delphi lang-pascal.js lang=pascal lang-pascal
Elixir lang-ex.js
lang-exs.js
lang=erl
lang=erlang
lang-erl
lang-erlang
Erlang lang lang lang
Go lang-go.js lang=go lang-go
Haskell lang-hs.js lang=hs lang-hs
Kotlin lang-kotlin.js lang=kotlin lang-kotlin
LaTeX and TeX lang-latex.js
lang-tex.js
lang=latex
lang=tex
lang-latex
lang-tex
Lisp, Scheme and Racket lang-cl.js
lang-el.js
lang-lisp.js
lang-lsp.js
lang-scm.js
lang-ss.js
lang-rkt.js
lang=cl
lang=el
lang=lisp
lang=lsp
lang=scm
lang=ss
lang=rkt
lang-cl
lang-el
lang-lisp
lang-lsp
lang-scm
lang-ss
lang-rkt
LLVM lang-ll.js
lang-llvm.js
lang=ll
lang=llvm
lang-ll
lang-llvm
Logtalk lang-logtalk.js lang=logtalk lang-logtalk
Lua lang-lua.js lang=lua lang-lua
Makefile lang-mk.js lang=mk lang-mk
MathLab lang-mathlab.js lang=mathlab lang-mathlab
MUMPS lang-mumps.js lang=mumps lang-mumps
Nemerle lang-nemerle.js lang=nemerle lang-nemerle
OCaml, SML, F#, et al lang-fs.js
lang-ml.js
lang=fs
lang=ml
lang-fs
lang-ml
Pascal lang-pascal.js lang=pascal lang-pascal
PHP lang-php.js lang=php lang-php
Protocol buffers lang-proto.js lang=proto lang-proto
R and S lang-r.js
lang-s.js
lang=r
lang=s
lang-r
lang-s
Regex lang-regex.js lang=regex lang-regex
Rust lang-rc.js
lang-rs.js
lang-rust.js
lang=rc
lang=rs
lang=rust
lang-rc
lang-rs
lang-rust
Scala lang-scala.js lang=scala lang-scala
S-plus lang-splus.js lang=splus lang-splus
SQL lang-sql.js lang=sql lang-sql
VHDL lang-vhdl.js
lang-vhd.js
lang=ex
lang=exs
lang-ex
lang-exs
Visual Basic lang-vb.js
lang-vbs.js
lang=ex
lang=exs
lang-ex
lang-exs
YAML lang-yaml.js
lang-yml.js
lang=erl
lang=erlang
lang-erl
lang-erlang
Table 21.3   Google Prettify other languages (must be loaded explicitly)

Yes, I’ve never heard of most of them either — still thank God MUMPS is there, what would we do without it.

To use any of these languages, the entry in the script parameter column must be entered in the <script> element in the <head> of the HTML. For example to interpret SQL, the script entry should be:

<script src="21-global/05-js/run_prettify.js?autoload=true&lang=sql"></script>

And the file lang-sql.js must be available in the directory:
21-global/-05-js/google-prettify/.

21.2.4

Understanding how Google Prettify displays code fragments

Google Prettify works by analysing any code fragment that is present on a web page. The code fragment must be contained in the semantic element <pre>...</pre> or in the sematic element <code>...</code> and in both cases that element must be given the class prettyprint.

This is an example of the HTML code needed to display a CSS code fragment:

<div class="code-extract">                          <!-- Start of code fragment -->
    <div class="code-header">css</div>              <!-- Code file name -->
    <div class="code-area">                         <!-- Start of code extract holder -->
       <pre class="prettyprint linenums lang-css"> 
.list-num {                     /* TEXT STYLE - Numbered list */
    font-family: "conc-i3-r";
    margin-left: 5rem;
    /* font-feature-settings: 'liga' 1, 'ss01' 0; */
}
.list-num li p {
    font-family: "eqty-ta-r";
    padding-left: 1rem;
    margin-bottom: 0.85rem;
}
       </pre>
    </div>                                           <!-- End of code extract holder -->
    <div class="code-caption">Code 99.3 &mdash; Code Fragment&mdash;CSS</div> 
</div>                                               <!-- End of code fragment -->

The code between the <pre>...</pre> tags is displayed as:

.list-num {                     /* TEXT STYLE - Numbered list */
    font-family: "conc-i3-r";
    margin-left: 5rem;
    /* font-feature-settings: 'liga' 1, 'ss01' 0; */
}
.list-num li p {
    font-family: "eqty-ta-r";
    padding-left: 1rem;
    margin-bottom: 0.85rem;
}
Code 99.3 — Code Fragment—CSS

The three <div> elements at the top of the code and the caption <div> at the bottom are containers to hold the code extract and give it a heading, a bit like figures and tables and done in much the same way, I explain those in sections 14 & 15 (it is just the usual styling stuff, fonts, background colours &c.).

The important bit is the <pre> element:

<pre class="prettyprint linenums lang-css>  

Google Prettify, started by the run_prettify.js software is looking for a <pre> element with the class prettyprint. If it finds one, it tries to interpret everything between the opening <pre> and closing </pre> as whatever is specified in the lang-... class (the lang-... class for each language are specified in the prettyprint class columns of Table 21.2 and Table 21.3)

The way Google Prettify works is it looks at the code contained in the <pre> (or <code>) element, it examines it in terms of whatever language has been specified for that bit of code (the lang-... class) and works out which bits of the code are keywords, functions, strings, constants, tags &c. and when it figures it out, it puts a <span>...</span> element around it with a class that represents what it is (e.g. <span class="kwd">font-family</span>).

I.e. wherever font-family (or similar property) is found in the code, it is given a span with the class kwd.

This class (kwd in this case) can then be given a particular colour by assigning CSS properties to it. This is done in the pretty.css file, that is what it is for.

I’ll come to the pretty.css file in a moment, but first I’ll look at the options available to the prettyprint operation.

Where Google Prettify finds a <pre> (or <code>) element with the class prettyprint, it also looks for other classes to be present and does certain things if they are:

Class Function Example
linenums If present turns on line numbering at the left side of each line of code. If missing there are no numbers <pre class="prettyprint linenums lang-css>
linenums:n Starts the line numbering at value n <pre class="prettyprint linenums:25 lang-css>
wrap Forces a line to wrap around, rather than use a horizontal scroll bar. If missing, any text that is too long for the <pre> container will not be displayed, and a horizontal scroll bar will appear (allowing the rest of the line to be viewed) <pre class="prettyprint linenums wrap lang-css>
Table 21.4   Google Prettify command classes

I’ll go through how to use each of these in the following sections.

Look again at the code fragment, this time I’ve indicated what span classes have been applied to each part of the code:

Figure 21.16 - CSS span classes assigned by Google Prettify
Figure 21.16   CSS span classes assigned by Google Prettify

In this case there are 6 different ones: .com, .kwd, .lit, .pln, .pun and .str.

  • If you are wondering how I can tell what class has been assigned to which bit of the code, I use a Chrome extension called CSSViewer, I highly recommend it, it is very useful for quickly identifying the CSS properties applied to any element on a web page.

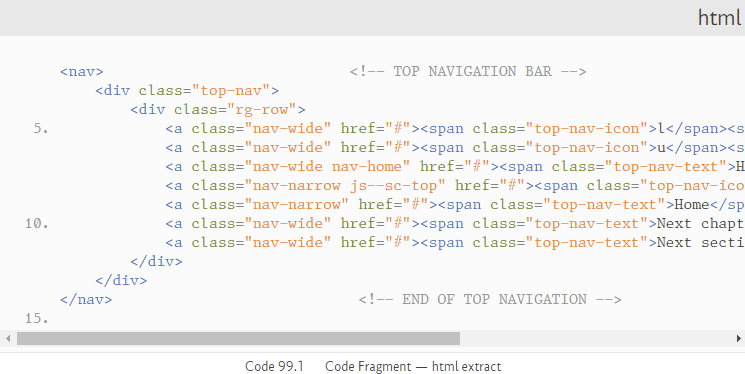
If I look at an HTML fragment I get some slightly different classes:

Figure 21.17 - HTML span classes assigned by Google Prettify
Figure 21.17   HTML span classes assigned by Google Prettify

The HTML has some of the same classes as the CSS and a few new ones.

Google Prettify can assign up to sixteen such classes:

Class Description Default colour PS HTML colour PS CSS
colour
.atn Attribute name #606 #758d0f As HTML
.atv Attribute value #080 #e98a0b As HTML
.clo Lisp close bracket #660 #4d4d4c As HTML
.com Comment #800 #949494 As HTML
.dec Declaration #606 #404030 As HTML
.fun Function #f00 #4271ae As HTML
.kwd Keyword #008 #8959a8 As HTML
.lit Literal (a value) #066 #e98a0b #718c00
.opn Lisp open bracket #660 #4d4d4c As HTML
.pln Plain text #000 #404030 #4271ae
.pun Punctuation #660 #535353 As HTML
.src Source none #404030 As HTML
.str String #080 #e98a0b As HTML
.tag Tag #008 #4f77c0 As HTML
.typ Type #606 #4271ae As HTML
.var Variable #606 #8757ad As HTML
Table 98.2   DenseTable

The span class that gets assigned to a component depends on the language class that has been set; Google Prettify will then identify each component and assign the relevant class.

The span classes generally assign a colour to that class that syntactically colours the code and gives it the appearances shown in Figure 21.16 and Figure 21.17.

The colours used (you’ve probably guessed) are set in the prettify.css file that is automatically loaded by run_prettify.js.

Let’s look at that next.

21.2.5

Understanding how Google Prettify displays code fragments

The prettify.css file is loaded by default by the run_prettify.js JavaScript file that is loaded by the web page (§ 21.2.1).

The prettify.css file came with Google Prettify (we downloaded the un-minimised version of it, see § 21.1.1), you will find it in the 21-global/05-js/google-prettify directory.

The default file looks like this:

default prettify.css
.pln { color: #000 }  /* plain text */

@media screen {
  .str { color: #080 }  /* string content */
  .kwd { color: #008 }  /* a keyword */
  .com { color: #800 }  /* a comment */
  .typ { color: #606 }  /* a type name */
  .lit { color: #066 }  /* a literal value */
  /* punctuation, lisp open bracket, lisp close bracket */
  .pun, .opn, .clo { color: #660 }
  .tag { color: #008 }  /* a markup tag name */
  .atn { color: #606 }  /* a markup attribute name */
  .atv { color: #080 }  /* a markup attribute value */
  .dec, .var { color: #606 }  /* a declaration; a variable name */
  .fun { color: red }  /* a function name */
}

/* Use higher contrast and text-weight for printable form. */
@media print, projection {
  .str { color: #060 }
  .kwd { color: #006; font-weight: bold }
  .com { color: #600; font-style: italic }
  .typ { color: #404; font-weight: bold }
  .lit { color: #044 }
  .pun, .opn, .clo { color: #440 }
  .tag { color: #006; font-weight: bold }
  .atn { color: #404 }
  .atv { color: #060 }
}

/* Put a border around prettyprinted code snippets. */
pre.prettyprint { padding: 2px; border: 1px solid #888 }

/* Specify class=linenums on a pre to get line numbering */
ol.linenums { margin-top: 0; margin-bottom: 0 } /* IE indents via margin-left */
li.L0,li.L1,li.L2,li.L3,li.L5,li.L6,li.L7,li.L8 { list-style-type: none }
/* Alternate shading for lines */
li.L1,li.L3,li.L5,li.L7,li.L9 { background: #eee }
Code 21.2   Default prettify.css file

You can see that basically all it does is assign colours to the various span classes; it does it in two goes, one if the code is being displayed on a screen (the only one we are interested in) and a higher contrast version if it is being printed out.

It also assigns some properties for an ordered list (the ordered list is used to display line numbers).

OK, that is the default prettify.css that came with Google Prettify. Take a good look, we aren’t going to use any of it.

21.2.6

The Practical Series prettify.css file

This is the file we are going to use:

practical series prettify.css
/* ****************************************************************************
   BASE FORMATTING FOR PRETTYPRINT
   ****************************************************************************
   The .prettyprint class applied to either a <pre> or <code> element cause
   the code to be displayed with span classes for each of the identifiable
   elements of the code (this is done client side after the page has loaded).

   This section formats the basic prettyprint class and the subsequent
   classes associated with either <pre> or <code>.

   The basic differences between the <pre> and <code> usage is:

        <pre>   Holds a section of code that appears as a separate block
                on the web page (optionally with a filename header and block
                caption footer).

       <code>   Holds a section of inline code that will appear formatted
                within a line of text

   ************************************************************************* */

.prettyprint { border: 0 !important }

pre.prettyprint {
    background: #fbfbfb;
    font-family: "trip-t4-r";
    font-size: 0.61rem;
    line-height: 135%;
    width: 99%;
    padding-left: 2.5rem;
    overflow: auto;                         /* will apply scroll bars if required */
}

code.prettyprint {
    background: #fff;
    font-family: "trip-t4-r";
    font-size: 0.85rem;
}

.wrap{white-space: pre-wrap;}

/* ----------------------------------------------------------------------------
   LINE NUMBERING
   ----------------------------------------------------------------------------
   adding the class .linenums to the <pre> element will add line numbering to
   the block of code.

   Line numbers are added every line, line numbers start at 1 unless specified
   other wise (add the class linenums:10 to start numbering at 10)
   ------------------------------------------------------------------------- */
ol.linenums {
    margin-top: 0;
    margin-bottom: 0;
    color: #949494;
}
li.L0,li.L1,li.L2,li.L3,li.L4,li.L5,li.L6,li.L7,li.L8,li.L9 {
    background-color: rgba(255, 255, 255, 0);
    list-style-type: decimal;
}

/* ----------------------------------------------------------------------------
   TOKEN COLOURING
   ----------------------------------------------------------------------------
   Prettify adds span classes to the individual elements (tokens) within the
   code; these are individually coloured in the following section
   ------------------------------------------------------------------------- */

.pln { color: #404030; }                    /* plain (default) text colour */
.str { color: #e98a0b; }                    /* string content */
.kwd { color: #8959a8; }                    /* keyword */
.com { color: #949494; }                    /* comment */
.typ { color: #4271ae; }                    /* variable type - e.g. int */
.lit { color: #e98a0b; }                    /* literal value */
.pun { color: #535353; }                    /* punctuation */
.opn { color: #4d4d4c; }                    /* lisp open bracket */
.clo { color: #4d4d4c; }                    /* lisp close bracket */
.tag { color: #4f77c0; }                    /* markup tag name */
.atn { color: #758d0f; }                    /* markup attribute name */
.atv { color: #e98a0b; }                    /* markup attribute value */
.dec { color: #404030; }                    /* declaration */
.var { color: #8757ad; }                    /* variable name */
.fun { color: #4271ae; }                    /* function name */

.lang-css .pln { color: #4271ae;} 
.lang-css .lit { color: #718c00;}
Code 21.3   Default prettify.css file

My file is bigger than the original (but it does have more comments in it)

Let’s go through it. The first bit turns off the borders that have been activated somewhere in the JavaScript (I don’t want those borders), the !important just makes my instruction take precedence over the JavaScript. Those borders are definitely turned off.

.prettyprint { border: 0 !important }

Next I set the font and various other fairly standard properties:

pre.prettyprint {
    background: #fbfbfb;
    font-family: "trip-t4-r";
    font-size: 0.61rem;
    line-height: 135%;
    width: 99%;
    padding-left: 2.5rem;
    overflow: auto;                 /* will apply scroll bars if required */
}

code.prettyprint {
    background: #fff;
    font-family: "trip-t4-r";
    font-size: 0.85rem;
}

I’ve split this into two, one for the <pre> element and one for the <code> element, Google Prettify will use either element, I use the <pre> to put a code fragment in its own box and I use the <code> element to display inline code (code that fits into a line of text), I give example of each in § 21.4.

I’ve set them to use the Triplicate font and defined the various font sizes, paddings, widths, line heights, &c. the usual stuff.

The width is set to 99% rather than 100%, this is to accommodate any scroll bars that might be needed, the scroll bar extends slightly outside of the container and setting a width of 99% just lines things up properly.

There is one property here that we haven’t used before:

    overflow: auto;

The overflow property assigns scroll bars to an HTML element if its content is too big for its container. The auto value just means that both horizontal and vertical scroll bars will be applied, but only if needed. It makes the code fragment look like this:

Figure 21.18 - Automatic application of scroll bars
Figure 21.18   Automatic application of scroll bars

The next thing is the wrap class, this is a class that we can apply with the prettyprint class to make the text wrap in the element (see Table 21.4)

.wrap {white-space: pre-wrap;}

The white-space property is another new property, it determines how the browser should wrap text that goes over the end of line, the pre-wrap value ensures that when text is wrapped (at a space), the space character is preserved; i.e. it will be present in the correct place if the code fragment is copied from within the browser window. This is important for code fragments; we don’t want spaces to go missing.

The wrap class does the following: the first image is a line of code without the wrap class, the second one with it:

Figure 21.19 - Code fragment without the wrap class
Figure 21.19   Code fragment without the wrap class
Figure 21.20 - Same code fragment with the wrap class
Figure 21.20   Same code fragment with the wrap class

The next thing is the line numbers; if a linenum class is applied, then line numbers will be displayed at the left side of the code fragment. These line numbers are just an ordered list applied by the JavaScript. I covered ordered lists in § 12.2, the CSS here just sets the basic properties for the numbers:

ol.linenums {
    margin-top: 0;
    margin-bottom: 0;
    color: #949494;
}
li.L0,li.L1,li.L2,li.L3,li.L4,li.L5,li.L6,li.L7,li.L8,li.L9 {
    background-color: rgba(255, 255, 255, 0);
    list-style-type: decimal;
}

The top and bottom margins are removed (I don’t actually think there were any to start with). Next the text colour of the line numbers is set to a lighter grey (#949494).

The next bit is a little strange; it selects the li elements, but has an additional selector L0 to L9. These represent the individual line entries L0 indicates the first line and every such occurrence in each decade, L0 thus represents line 1, line 11, line 21, line 31 &c.

L1 represents the second line e.g. line 2, line 12, line 22 &c. L9 being the 10th entry e.g. line 10, line 20, line 30 &c.

Here I’ve ensured that every line has exactly the same properties:

li.L0,li.L1,li.L2,li.L3,li.L4,li.L5,li.L6,li.L7,li.L8,li.L9 {
    background-color: rgba(255, 255, 255, 0);
    list-style-type: decimal;
}

I’ve made the background colour transparent rgba(255, 255, 255, 0), this means that each line will have the same background colour set for the prettyprint class (#fbfbfb) in this case.

Setting list-style-type: decimal; makes the line number use decimal notation.

If alternate line colouring was required, the following lines could be added:

li.L0,li.L1,li.L2,li.L3,li.L4,li.L5,li.L6,li.L7,li.L8,li.L9 {
    background-color: rgba(255, 255, 255, 0);
    list-style-type: decimal;
}
li.L1, li.L3, li.L5, li.L7, li.L9 { background-color: #eee }

This would apply a different background colour to each alternate line:

Figure 21.21 - Alternate line colouring
Figure 21.21   Alternate line colouring

It is also possible to number only certain lines:

li.L0,li.L1,li.L2,li.L3,li.L4,li.L5,li.L6,li.L7,li.L8,li.L9 {
    background-color: rgba(255, 255, 255, 0);
    list-style-type: none;
}
li.L4, li.L9 { list-style-type: decimal }

It gives:

Figure 21.22 - Specific line numbering
Figure 21.22   Specific line numbering

The final bit of pretty.css sets all the colours:

.pln { color: #404030; }                    /* plain (default) text colour */
.str { color: #e98a0b; }                    /* string content */
.kwd { color: #8959a8; }                    /* keyword */
.com { color: #949494; }                    /* comment */
.typ { color: #4271ae; }                    /* variable type - e.g. int */
.lit { color: #e98a0b; }                    /* literal value */
.pun { color: #535353; }                    /* punctuation */
.opn { color: #4d4d4c; }                    /* lisp open bracket */
.clo { color: #4d4d4c; }                    /* lisp close bracket */
.tag { color: #4f77c0; }                    /* markup tag name */
.atn { color: #758d0f; }                    /* markup attribute name */
.atv { color: #e98a0b; }                    /* markup attribute value */
.dec { color: #404030; }                    /* declaration */
.var { color: #8757ad; }                    /* variable name */
.fun { color: #4271ae; }                    /* function name */

Easy. There is just a little more:

.lang-css .pln { color: #4271ae;} 
.lang-css .lit { color: #718c00;}

This changes the colour if the code is CSS (if it is it will have the class lang-css).

All these colours have been picked to make the code fragments have similar colouring to Brackets.


End flourish image